Ring & Ship · Merchant guideFrom paid
From paid
to published.
Your Orders app, then your shop page. One clear step at a time, with a voice that explains each screen out loud.
Would you like Emma to read each step out loud?
You can change this any time with the Voice button at the top.
Tip: keep the voice on for your first run. Each step is explained slowly, and nothing you do here sends anything.
0:00
The frames on the picturesGold frame: tap thisRed box: don’t touch itGreen frame: just check
Part A · your first 5 minutes
The app
Part B · set up your shop
Your shop
Part C · on your phone
Pings and the app
Part D · after you publish
What happens next
Before you start
- You have the email we sent you (“Your account is ready”), with your name and your password.
- Your phone, with the Orders link. A computer works too, but the app is made for the phone.
- Photos of what you sell, in your phone’s photo album (3 or 4 is a good start).
- Your shipping costs, in your own words, and how your customers pay you (Zelle, check, card…).
Stuck on a screen?
Don’t guess: text Salah on the Ring & Ship line, or email him. Send a screenshot of the screen you are on, and he writes back with the next step.
Prefer paper?
The same guide as a 29-page PDF, dated 14 October 2026: read it on screen or print it and keep it next to your phone. Same steps, same pictures, same words.
Part A · 4 stepsYour first five minutesThe app, with a pretend customer
S1
Welcome email
Your account is ready
0:00
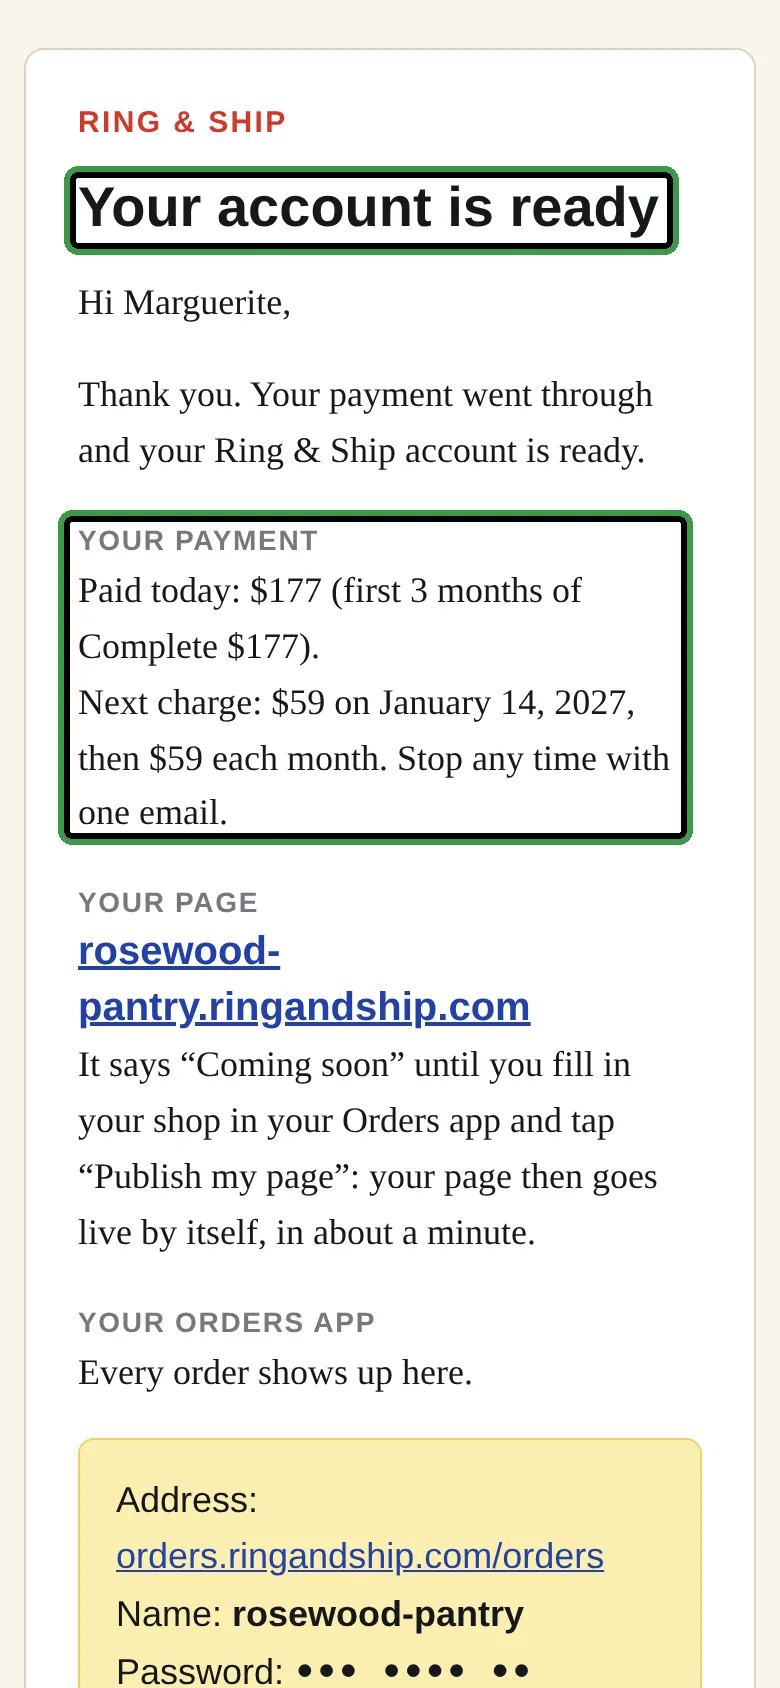
- 1Open the email from Ring & Ship: the subject is Your account is ready. At the top you see what you paid today, and when the next charge comes.
- 2Scroll down to YOUR PAGE: that is your own web address. It says “Coming soon” until you publish. Under it, the yellow box gives your Address, your Name and your Password (three short words; we hide it in this picture).
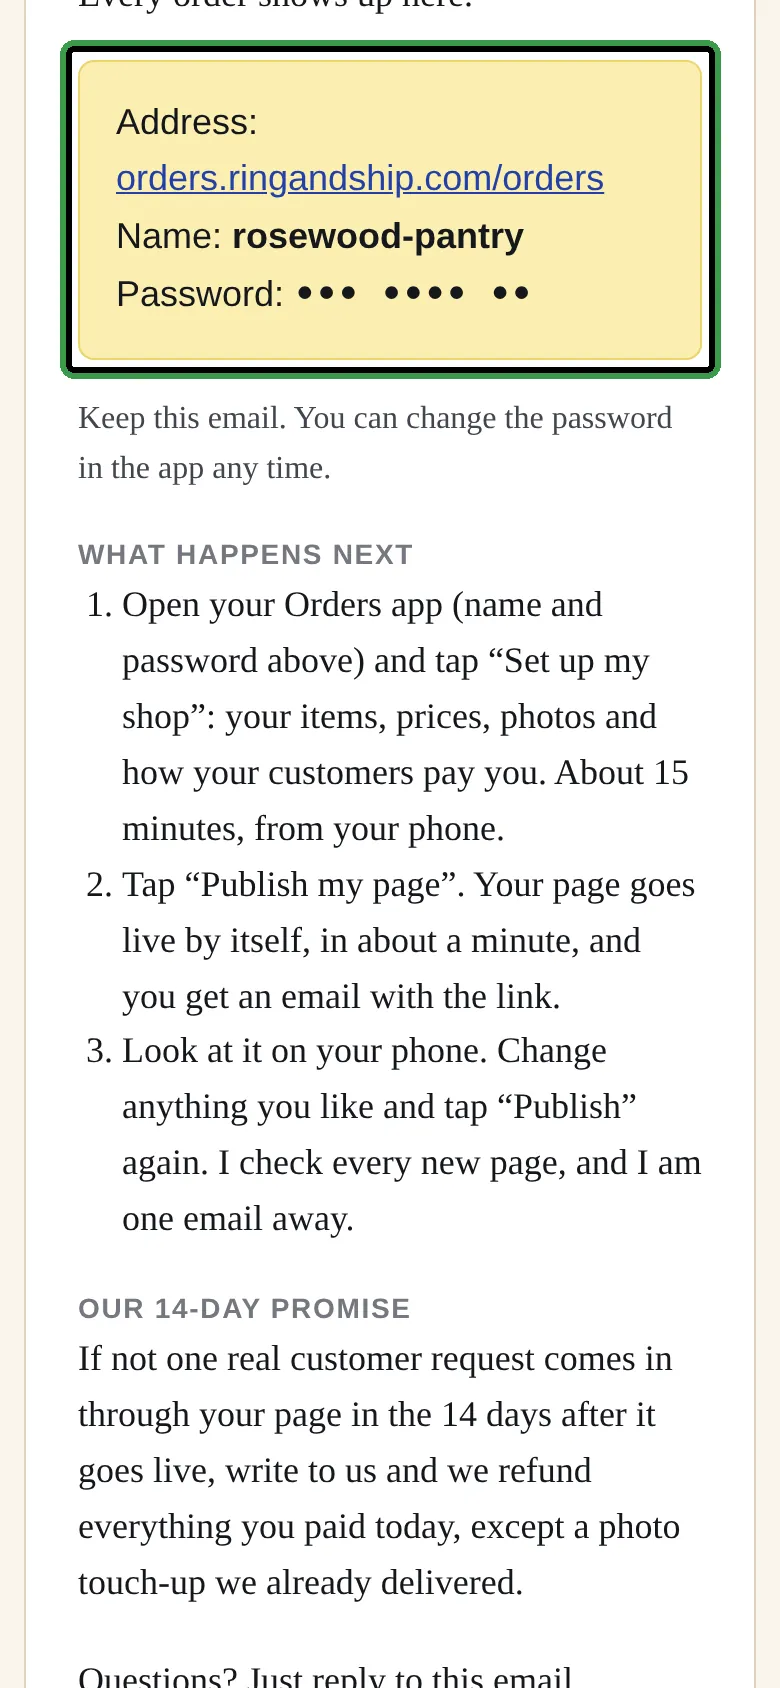
Keep this email. You can change your password in the app any time, and Salah is one email away.
S2
Your Orders app
Sign in and tap “Open my orders”
0:00
- 1Open the Orders link from the email. In Your login name, type the Name from the yellow box (with the small dashes). Then your Password (three short words).
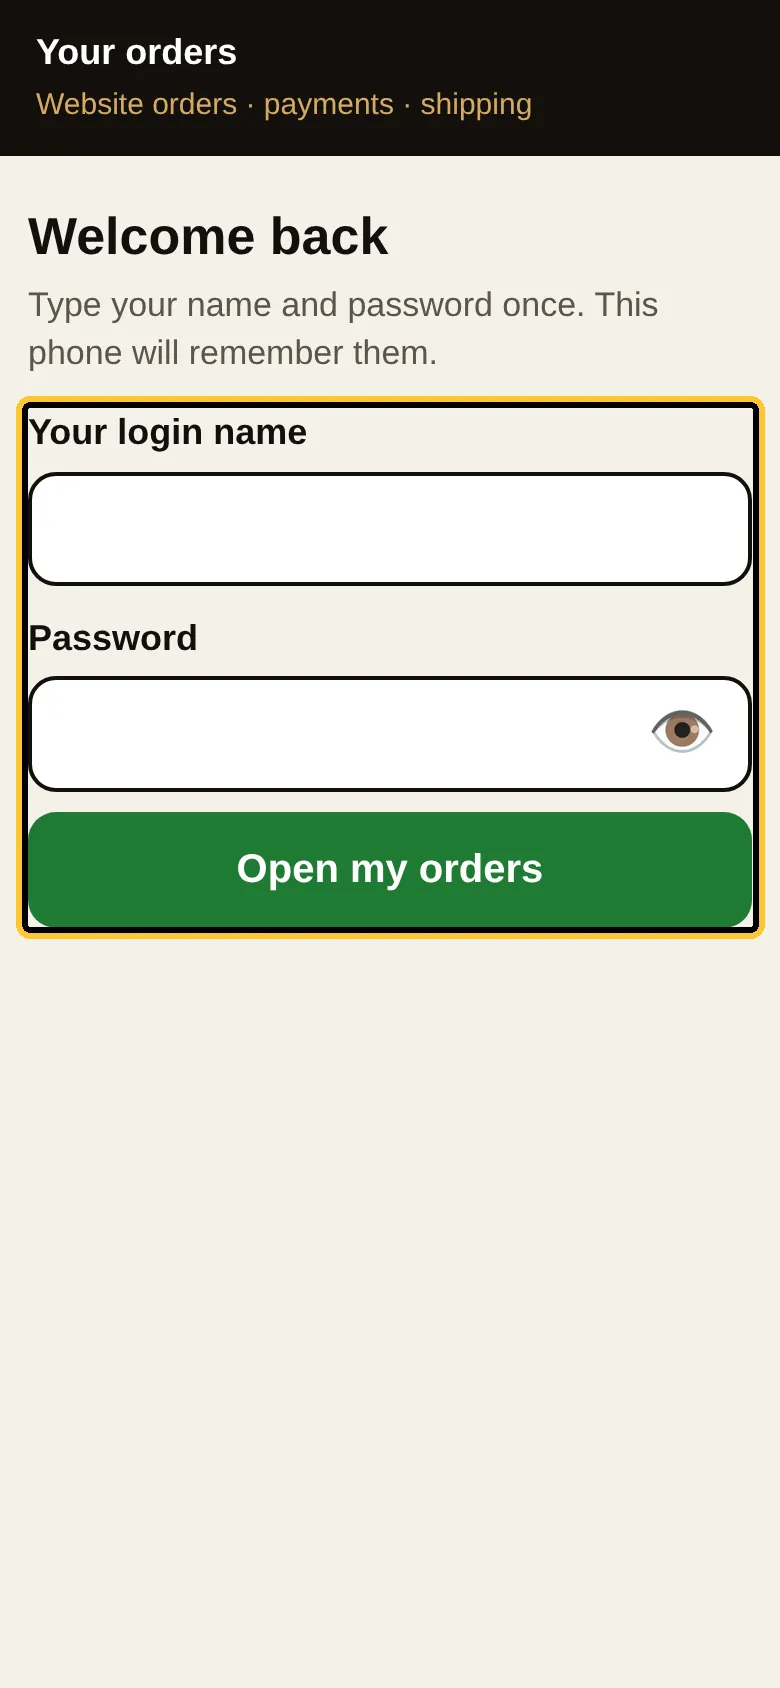
- 2Tap Open my orders. You land on your Orders page: this is where every order will arrive, by itself.
Password refused? Look at the email again and type the three words slowly, with the spaces. You can try as many times as you want.
S3
Practice · step 1 of 2
Get paid: tap “Mary paid”
0:00
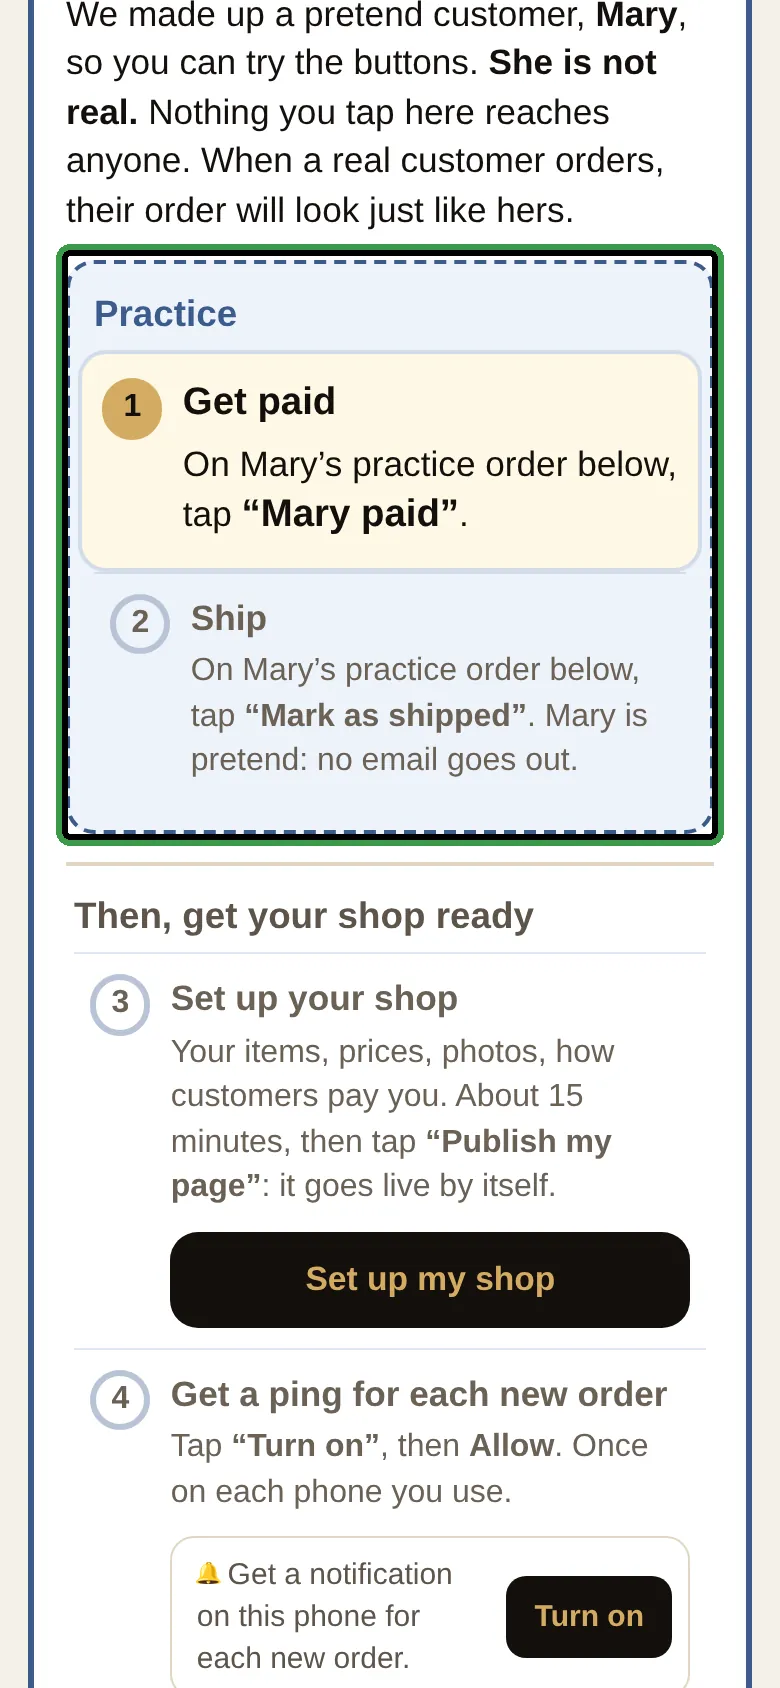
- 1The app says Let’s practice first. Mary is a pretend customer we made up: she is not real, and nothing you tap here reaches anyone.
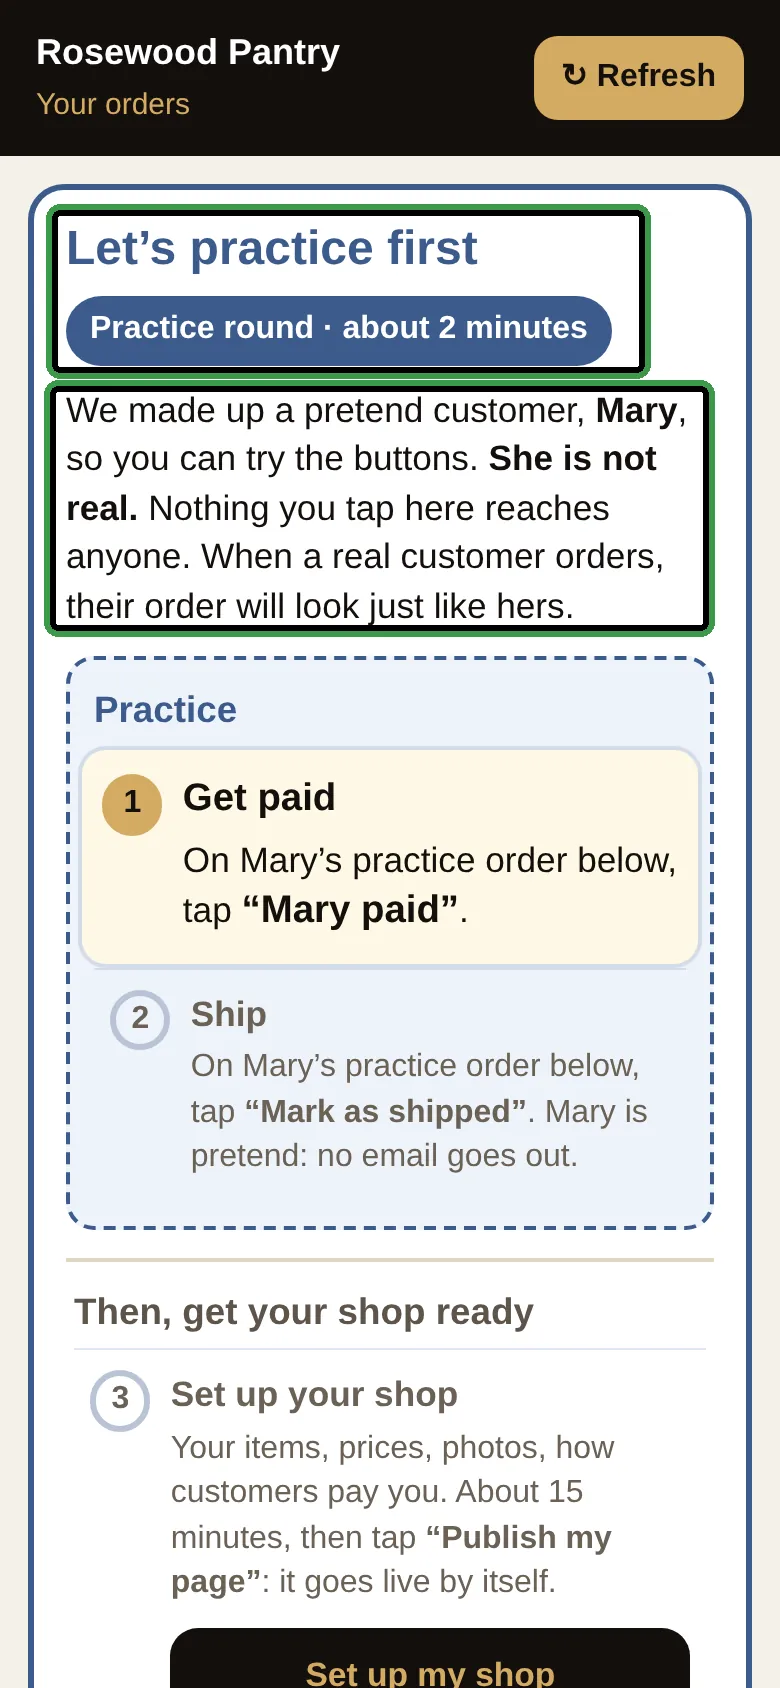
- 2The practice has two steps, one at a time: 1 Get paid, then 2 Ship.
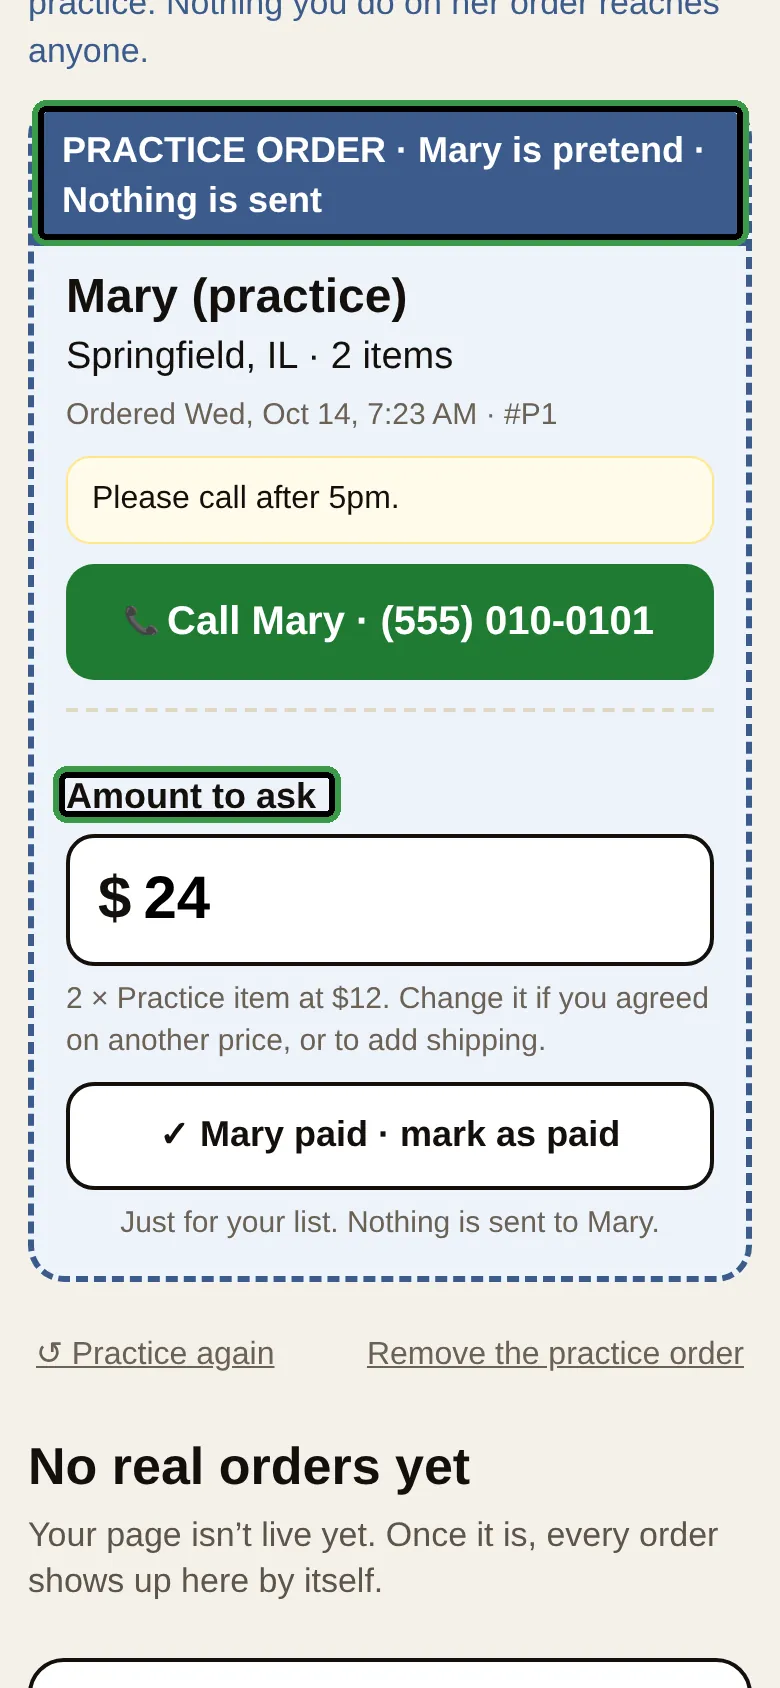
- 3Scroll down to Mary’s blue card, the one with the PRACTICE ORDER band at the top. Look at Amount to ask: $24. On a real order you change it if you agreed on another price.
- 4Tap Mary paid · mark as paid. That is all.
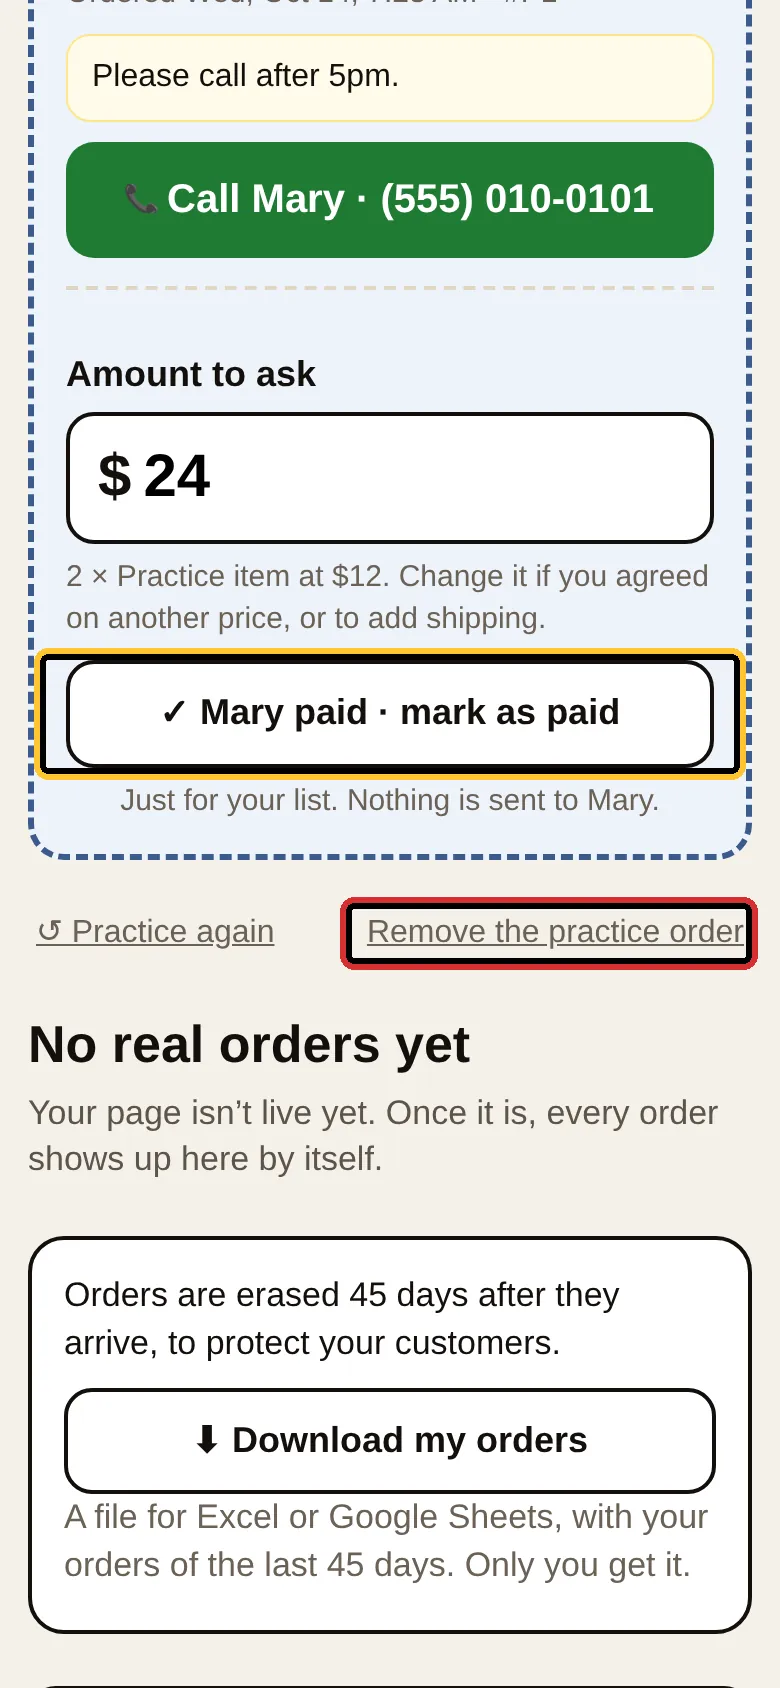
The green Call Mary button shows you what your phone would do on a real order. Once you add Zelle in your shop, a Text Zelle info button shows up next to it.
S4
Practice · step 2 of 2
Ship: tap “Mark as shipped”
0:00
- 1On the same card, tap Mark as shipped & email Mary. A small window says Mary is pretend, so no email is sent: tap OK.
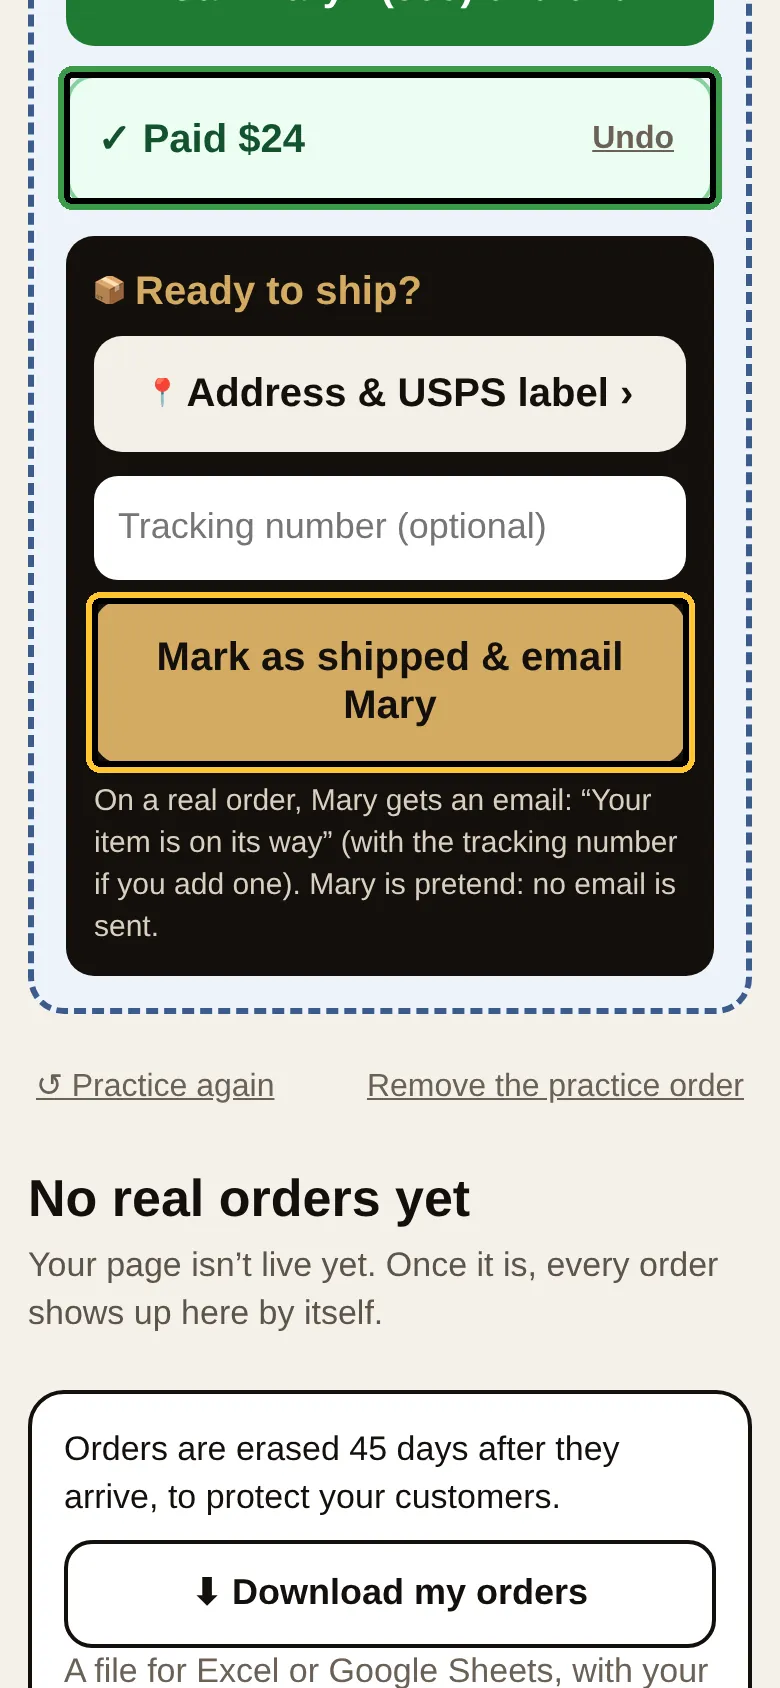
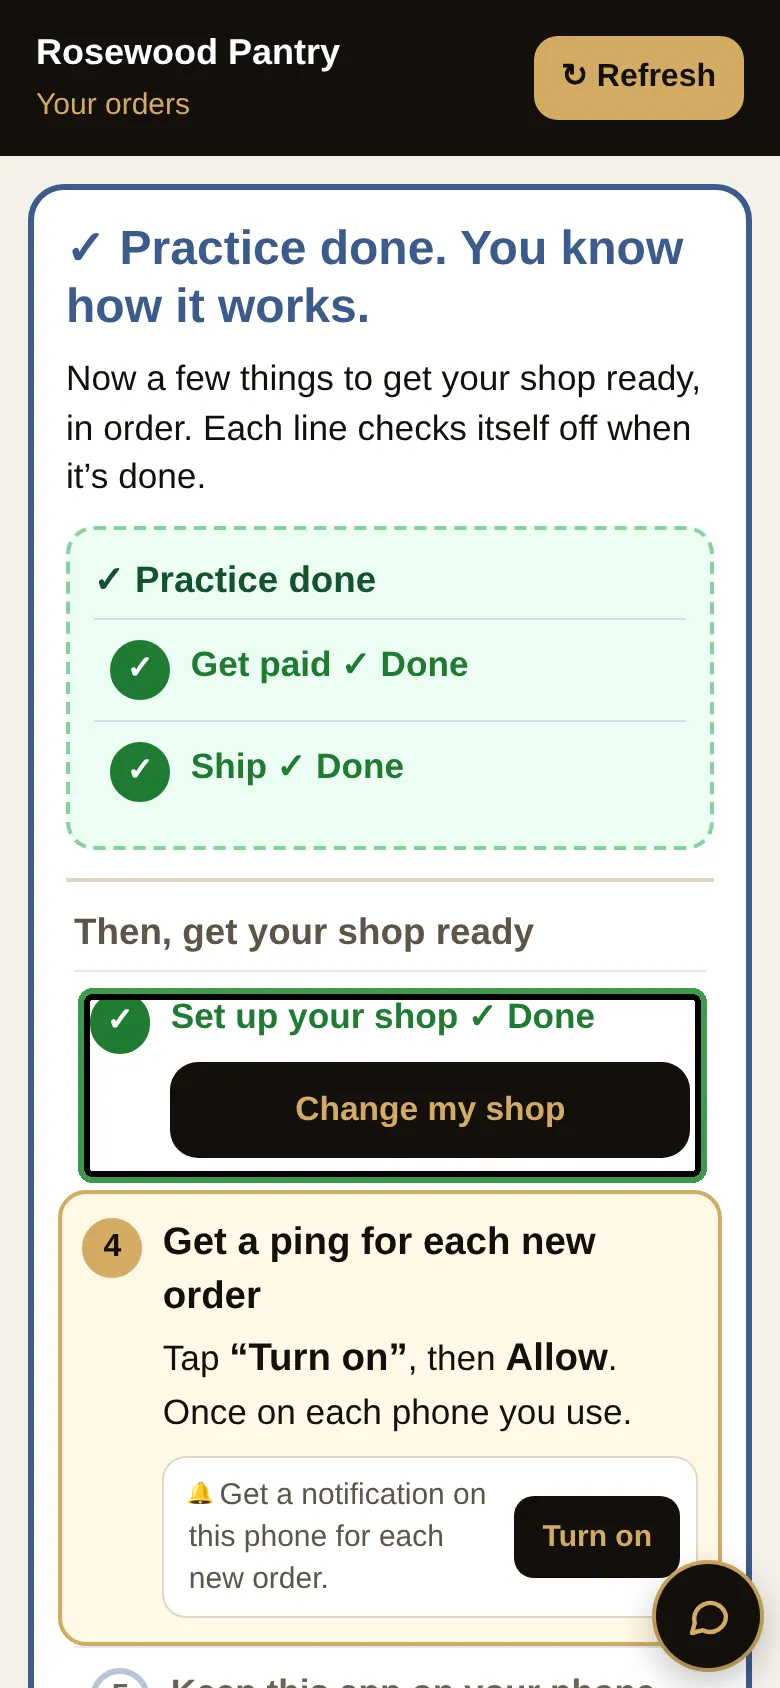
- 2✓ Practice done. You know how it works. Both practice steps are checked for you, all by themselves.
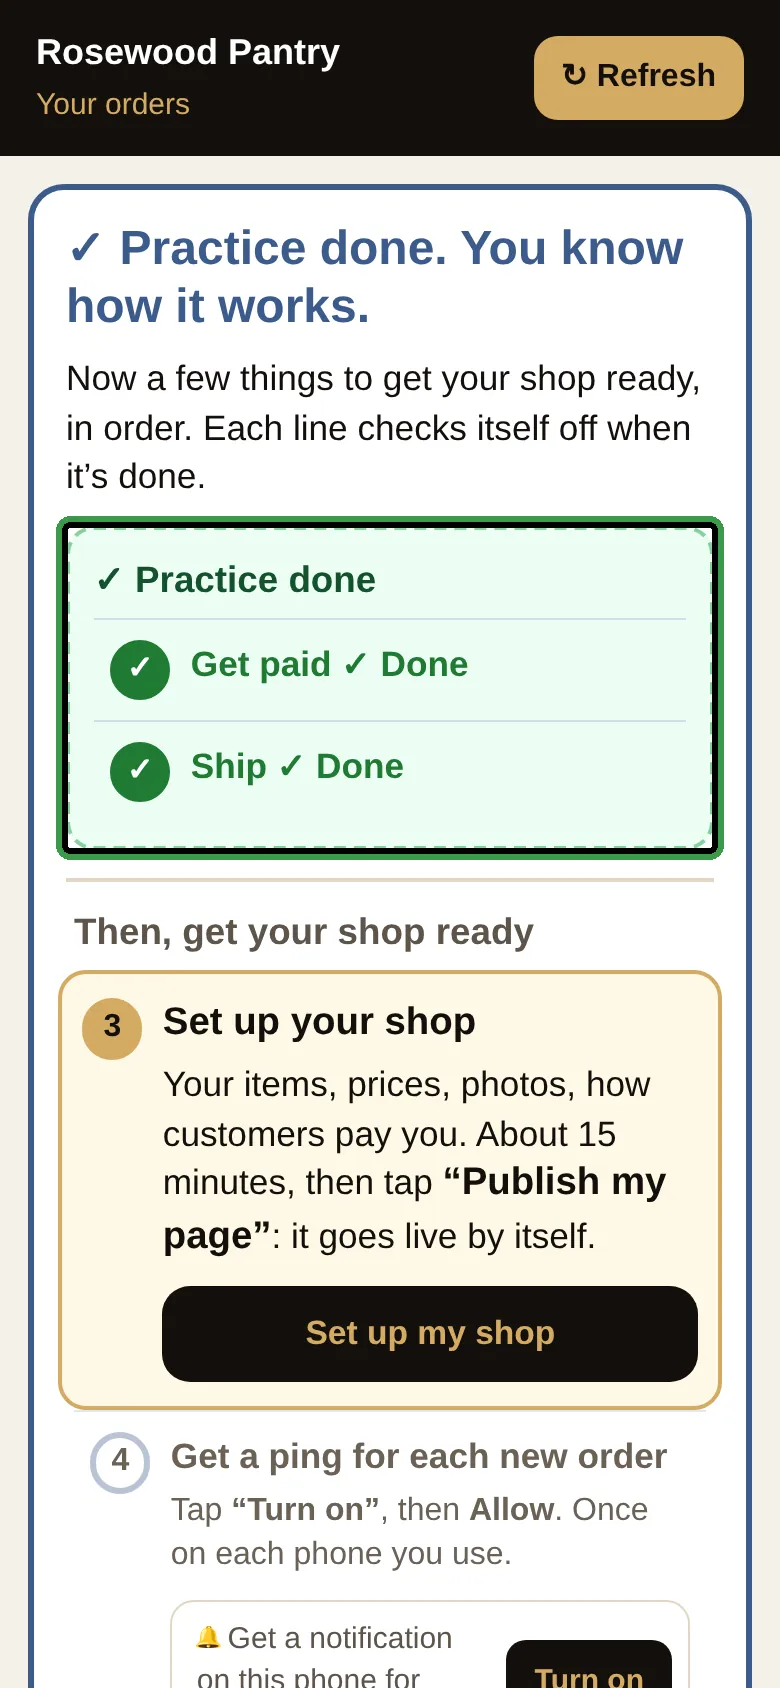
- 3The list goes on: line 3 is Set up your shop, line 4 the notifications, line 5 keeping the app on your phone.
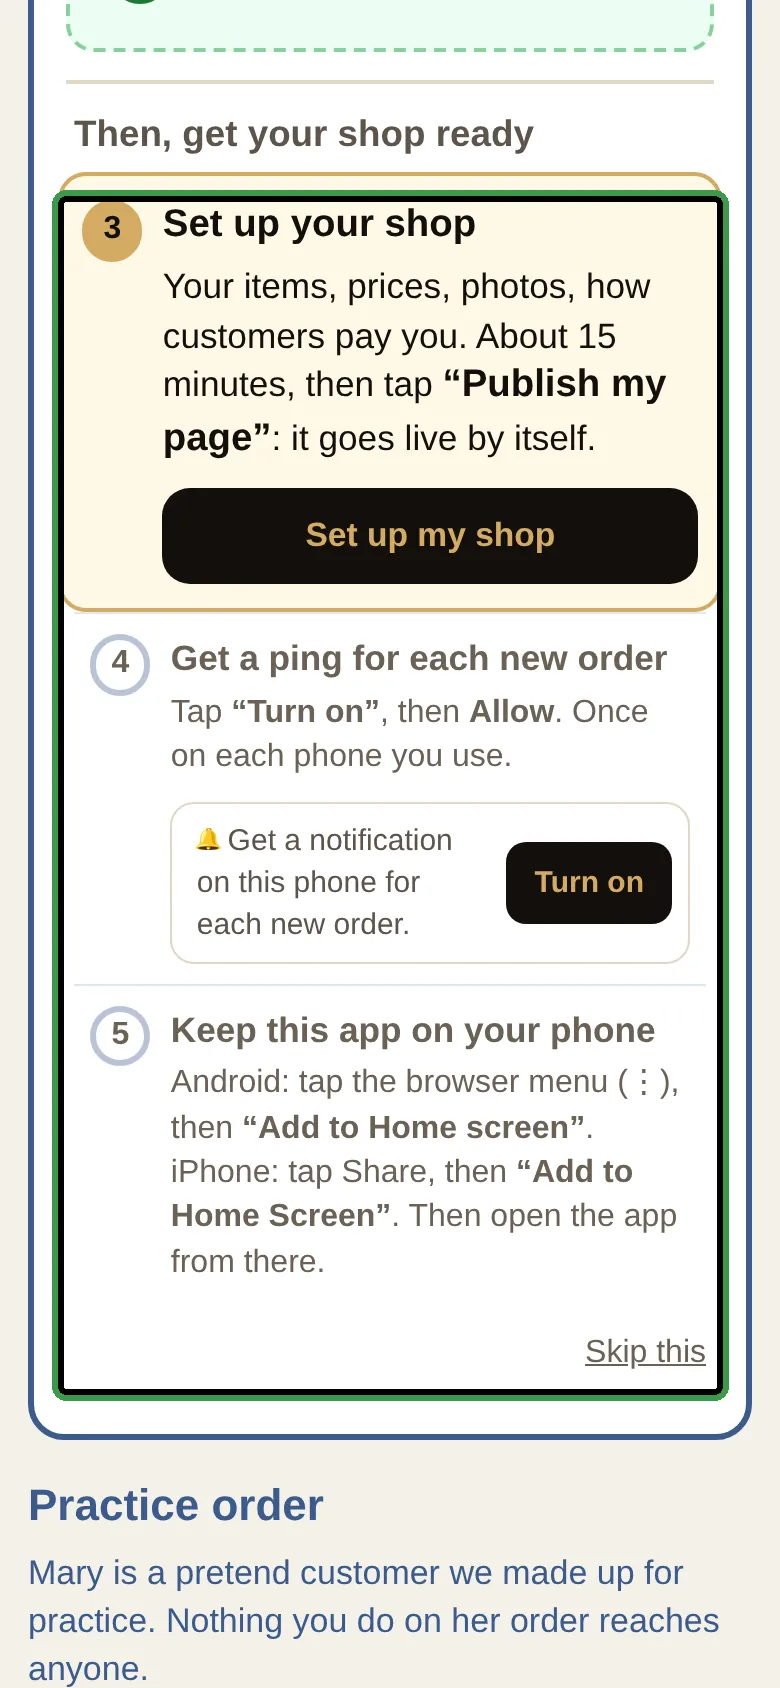
Want to try again later? Tap Practice again: Mary comes back new and the two steps uncheck. Remove the practice order hides her for good.
Part B · 6 stepsSet up your shopSix short screens, about 15 minutes
S5
Set up your shop · step 1 of 6
Pick your page look
0:00
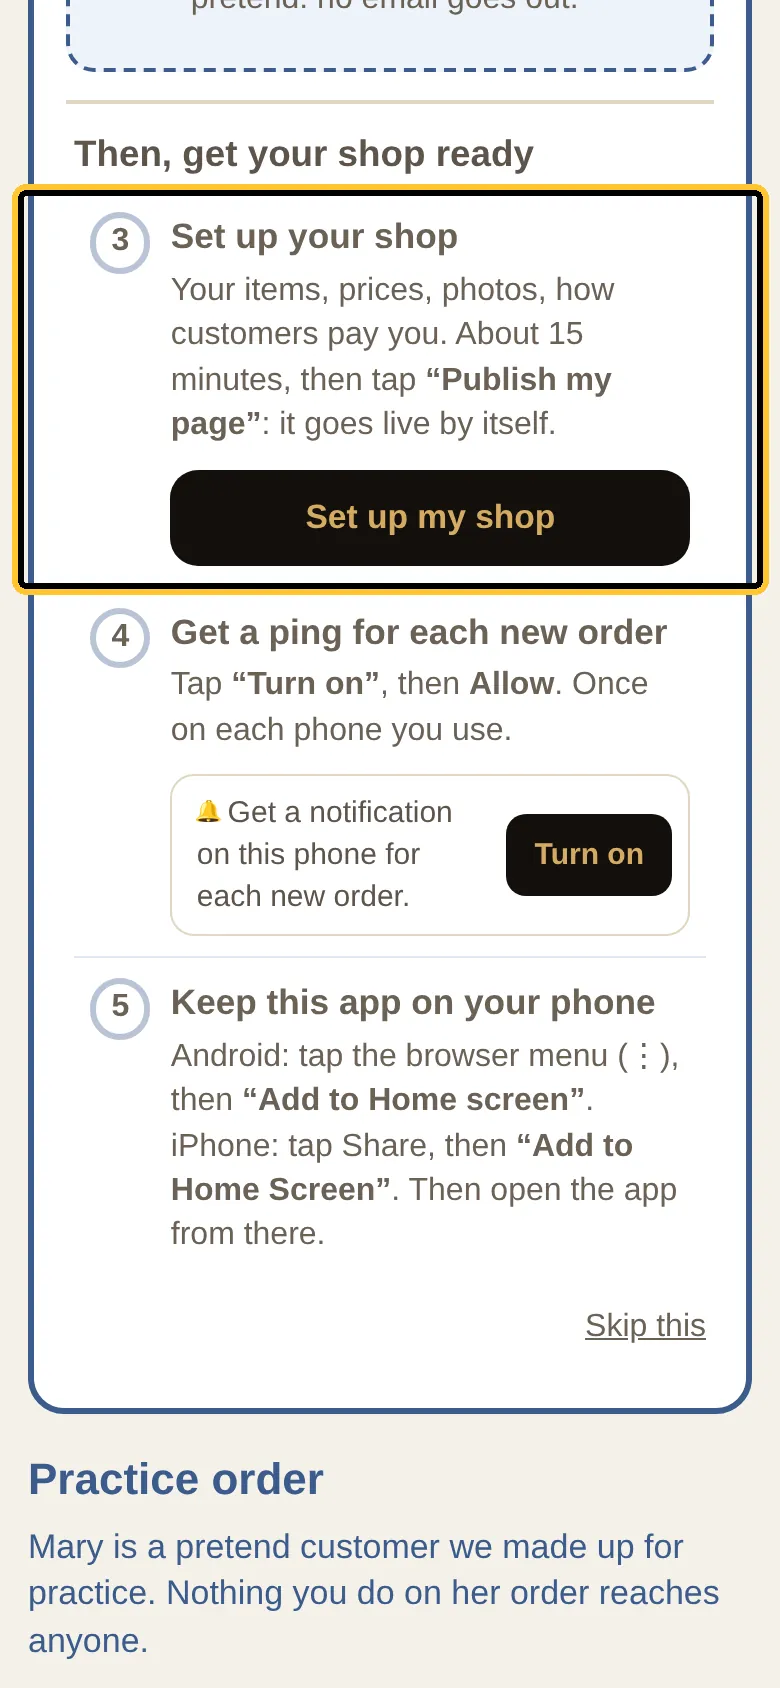
- 1On the Orders page, line 3: tap Set up my shop.
- 2Six short screens follow, one at a time. Screen 1 of 6: tap the look that fits your business. Nothing is final — you can change it later, and Salah can build you a custom look.
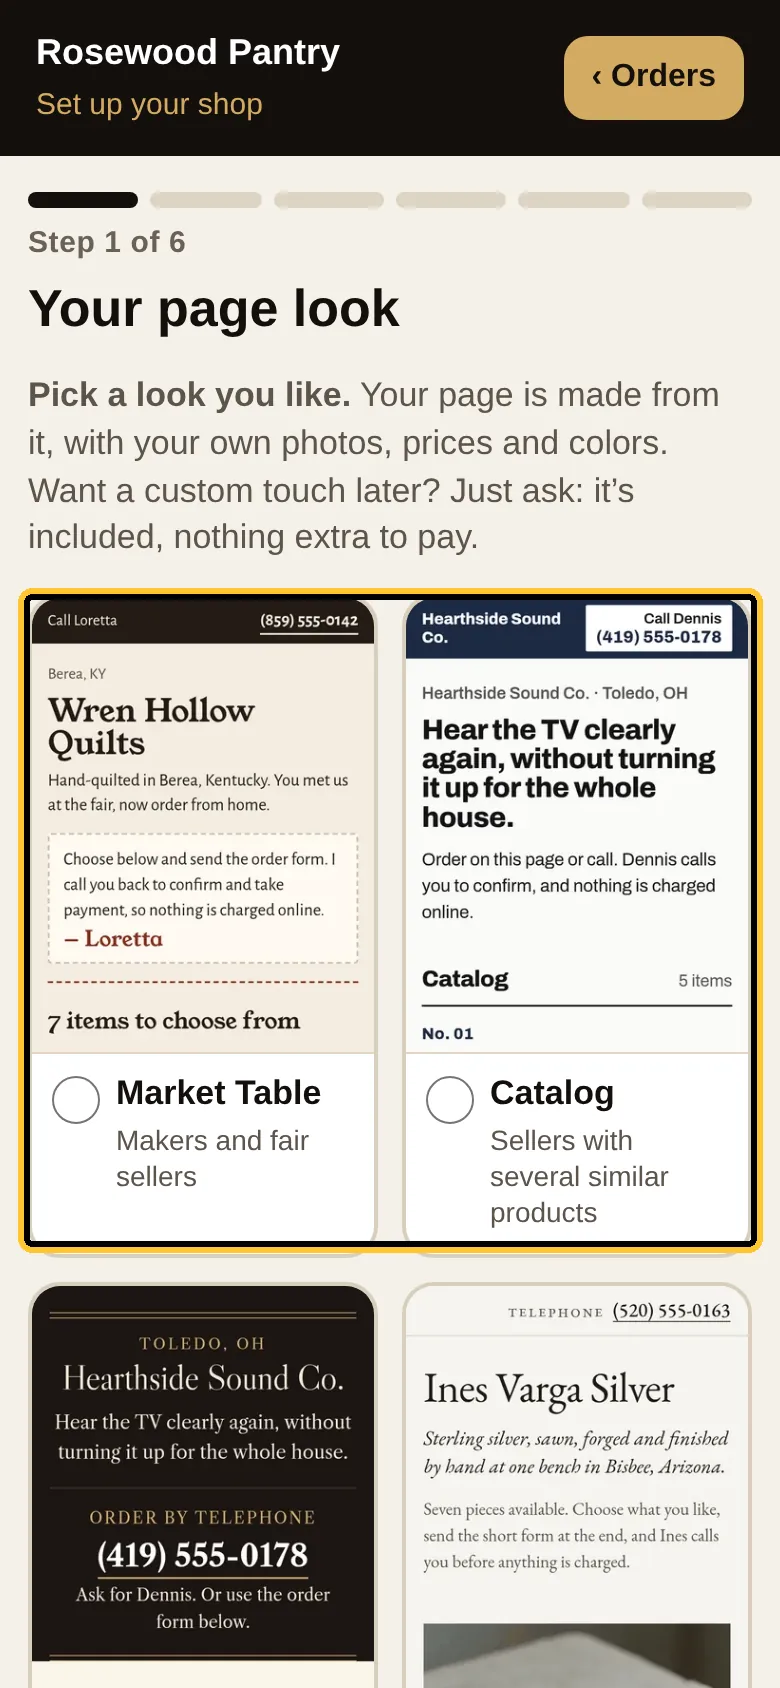
- 3The one you tapped gets a black dot and a dark frame. Here we picked Pantry Label: that name comes back on the last screen, when you check everything.
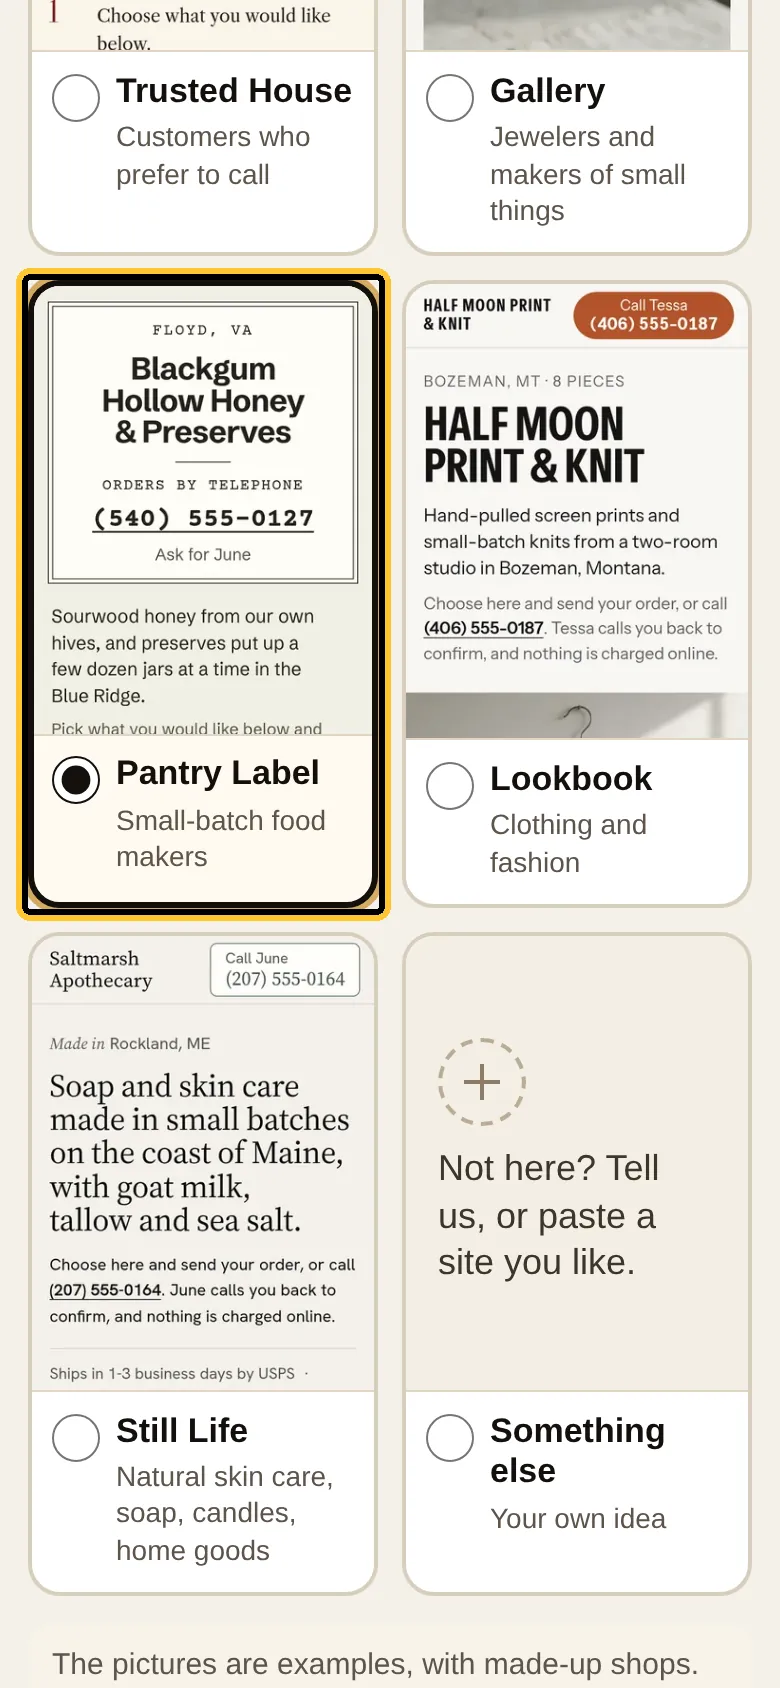
The pictures are examples drawn with other shops. Your page will use your own photos, prices and colours.
S6
Set up your shop · step 2 of 6
Add what you sell
0:00
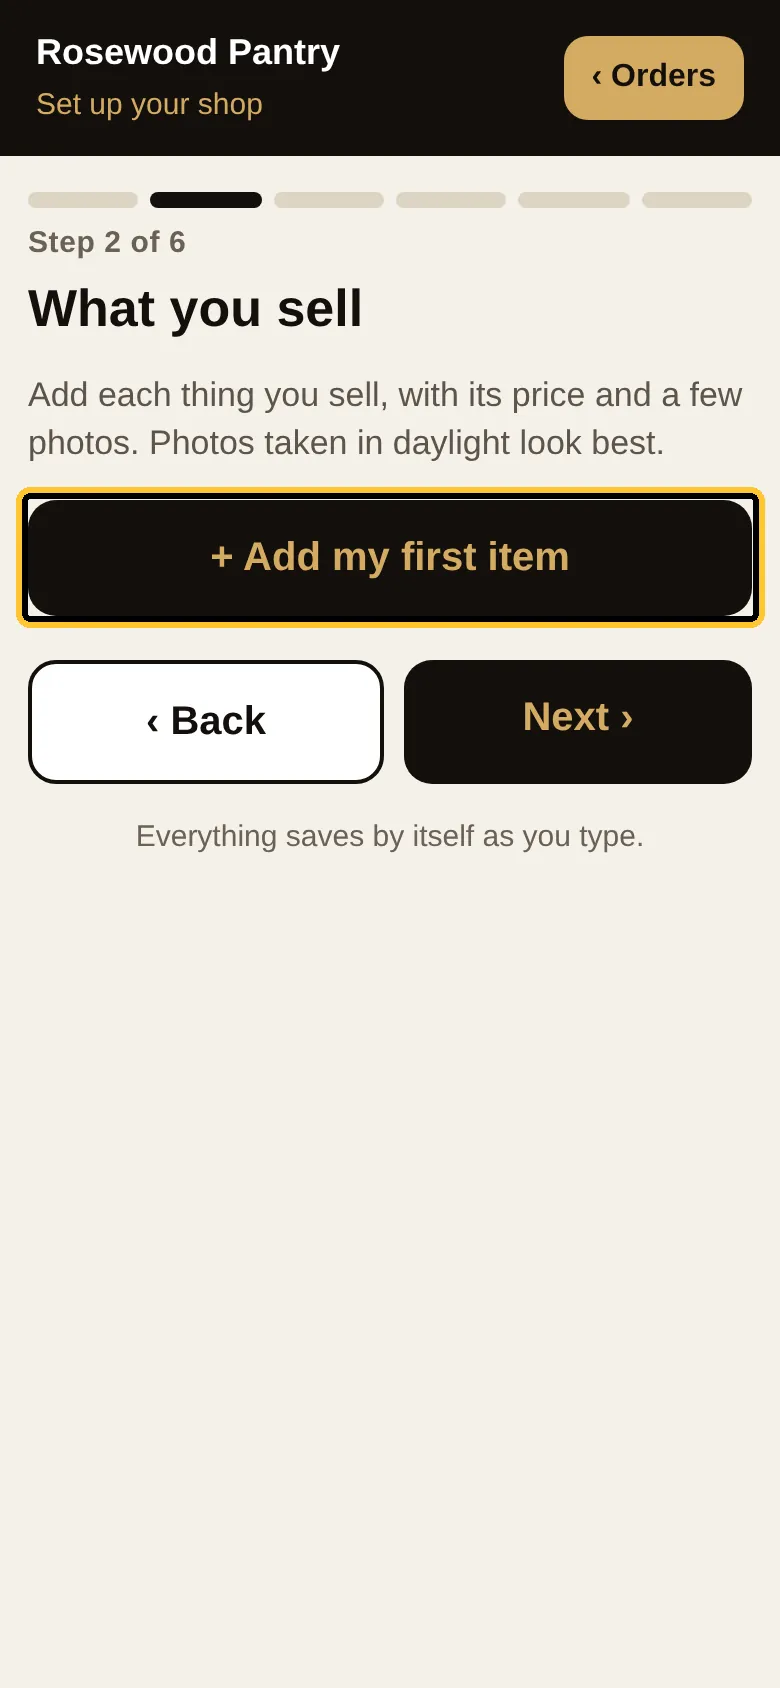
- 1Screen 2 of 6 is empty for now. Tap the dark button + Add my first item.
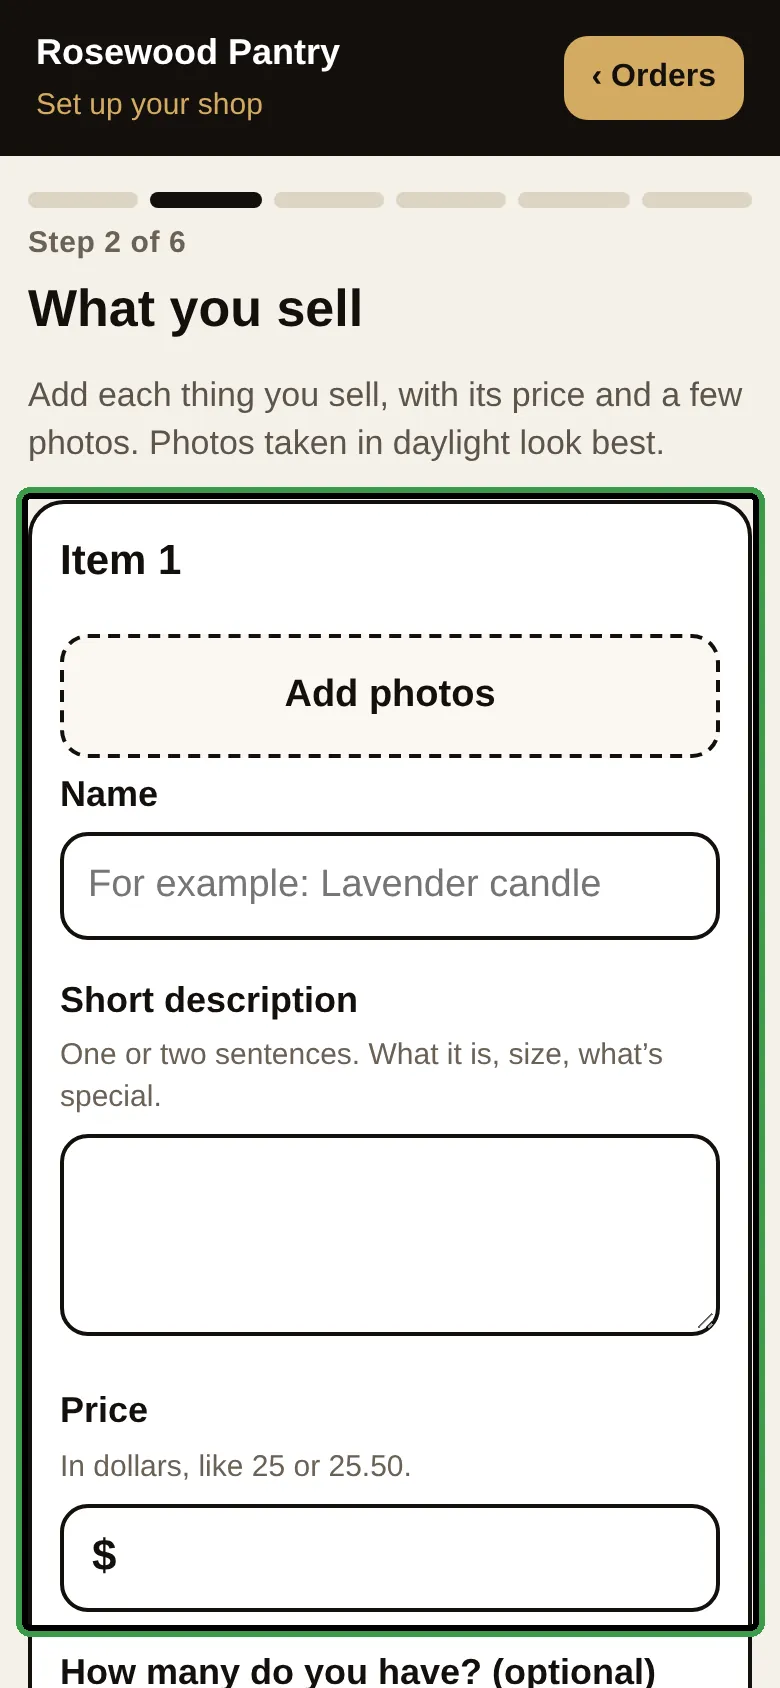
- 2The form opens below: Add photos, the Name, one or two short sentences, and the Price. Photos from your phone are fine, the app keeps them as they are.
- 3A finished item looks like this: photos, a name, a short description, the price, and how many you have. Three items and four photos make a good page to start with.
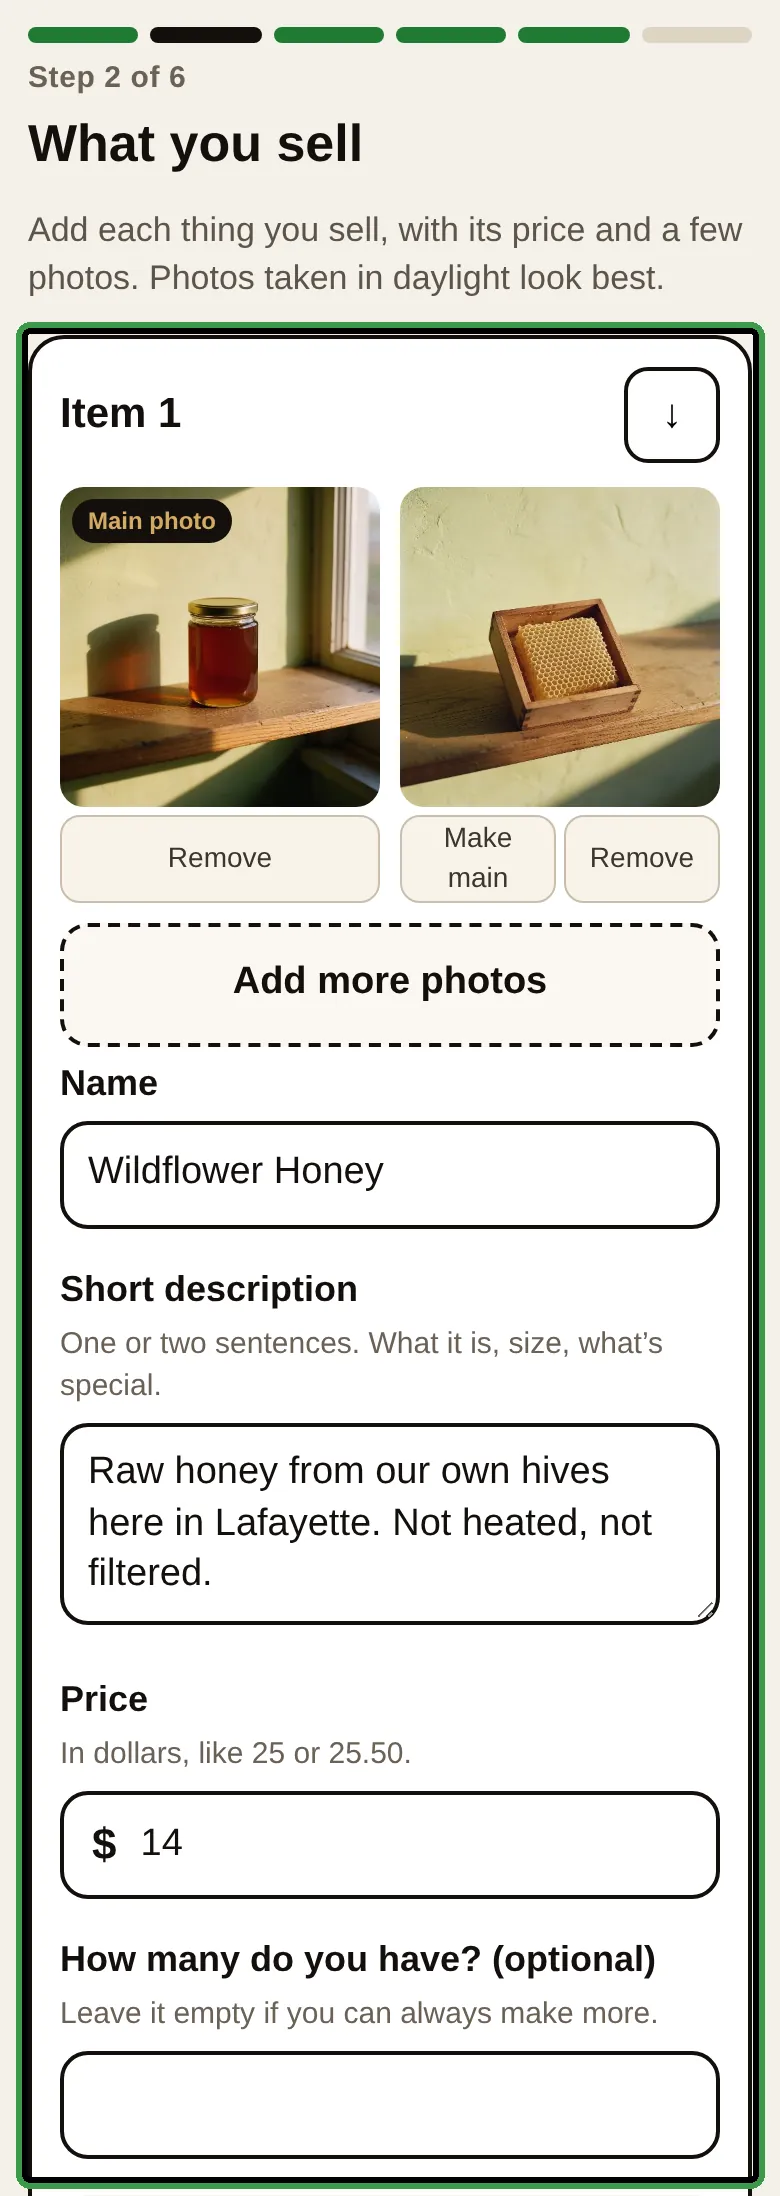
Everything saves by itself while you type. There is no button to press, and nothing is lost if you close the app.
S7
Set up your shop · step 3 of 6
Check how you get paid
0:00
- 1Tick every way your customers can pay you: Card by phone, Zelle, Cash App, Venmo, PayPal, Bank transfer, or Something else (a check by mail, for example).
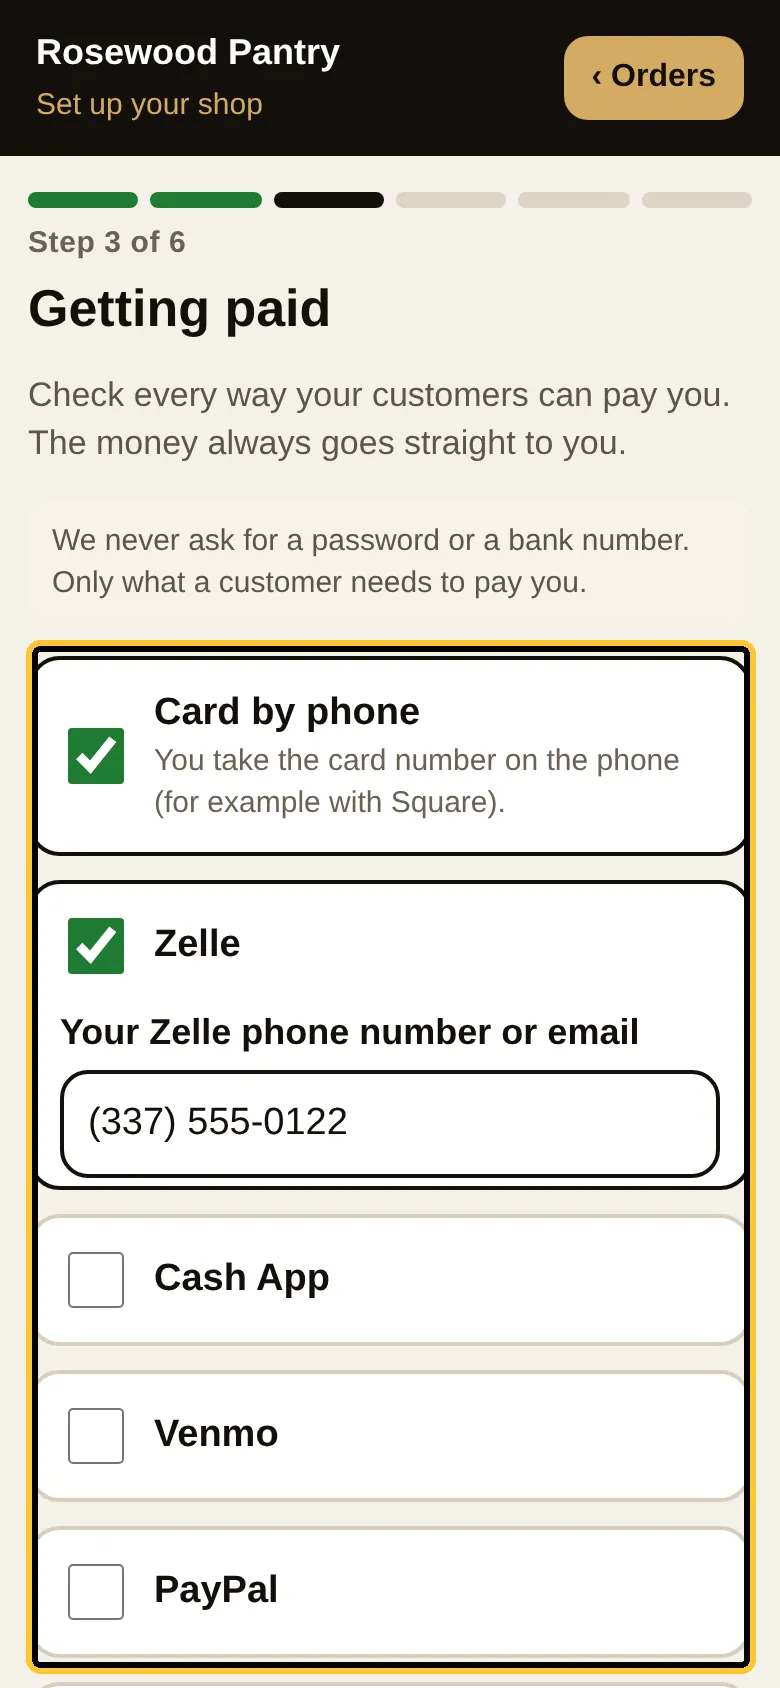
- 2When a way is ticked, the app asks for what your customer needs to pay you: your Zelle number or email, your Cash App name, or the words to write in the box yourself.
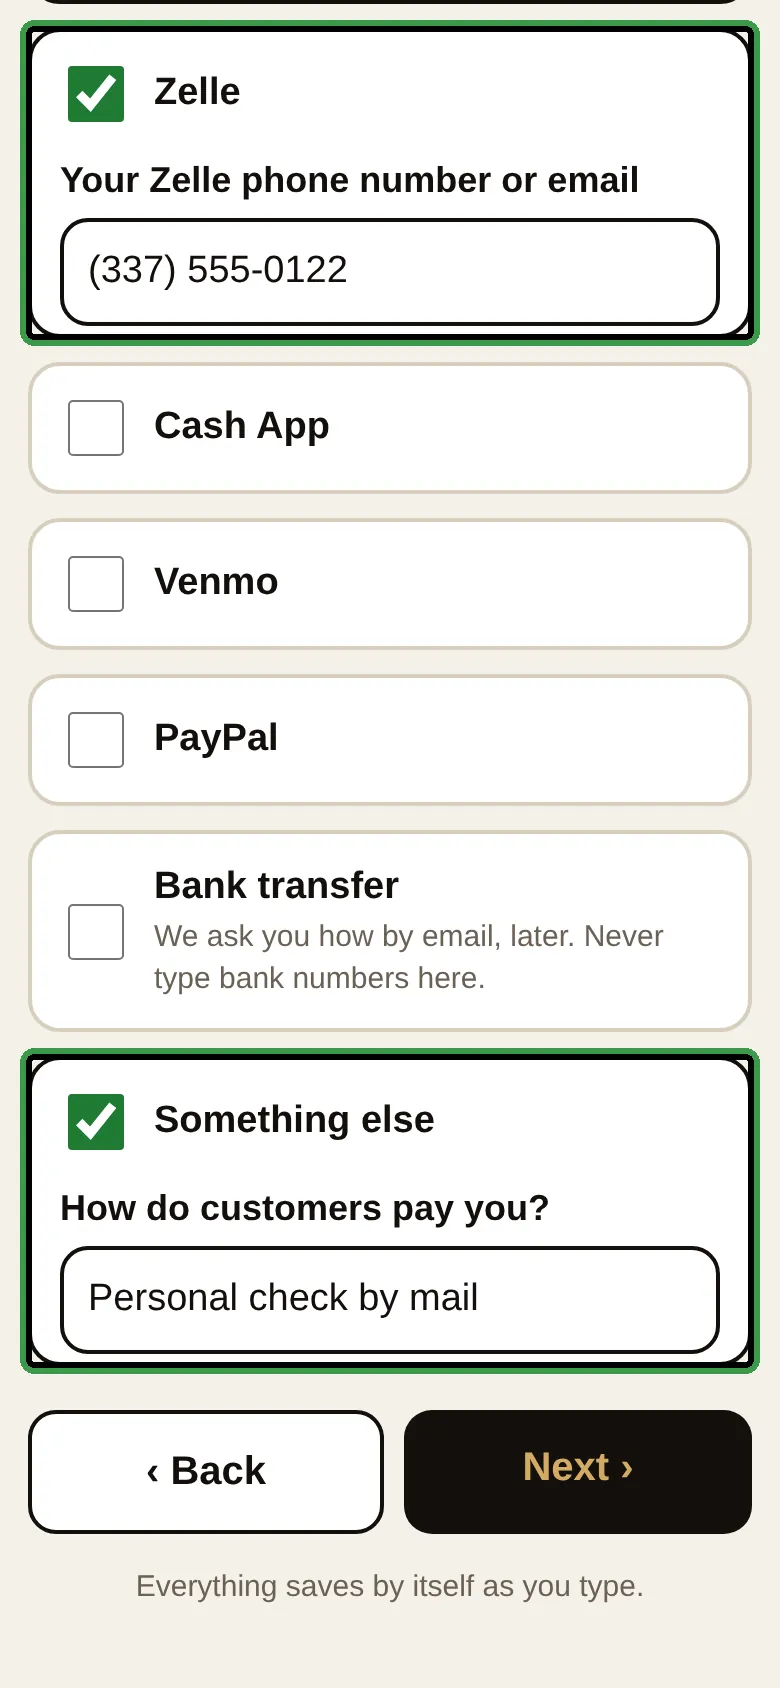
The money always goes straight to you. We never ask you for a password or a bank number: the app only shows your customer what they need to pay you.
S8
Set up your shop · step 4 of 6
Say how you ship
0:00
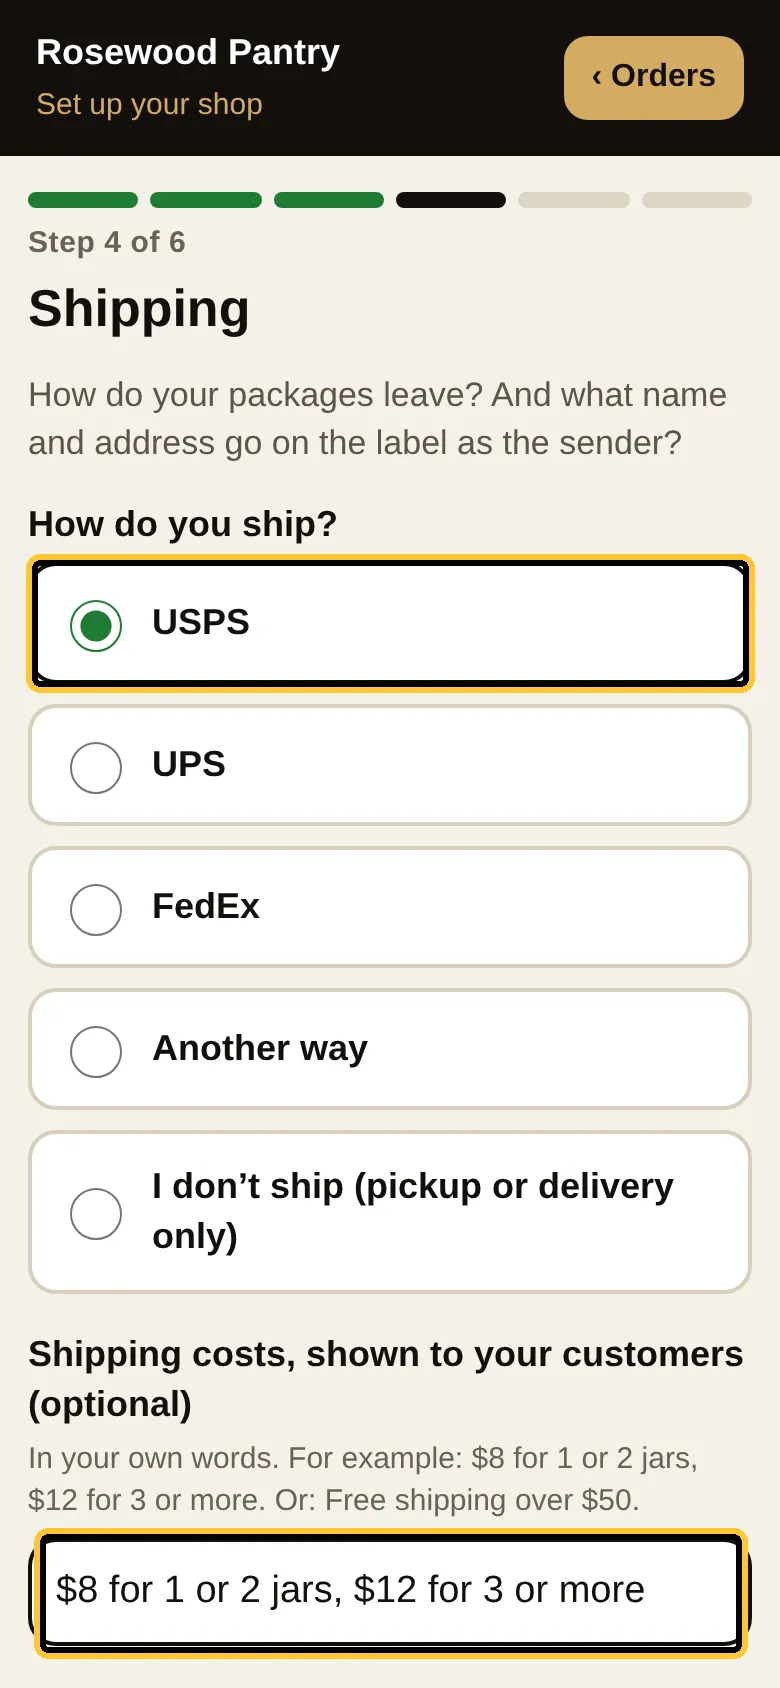
- 1First, how you ship: USPS is the usual choice. Then Shipping costs, shown to your customers, in your own words — for example: $8 for 1 or 2 jars, $12 for 3 or more.
- 2Then your business name and address. They are printed on the shipping labels, and they appear in the legal part of your page. A company name if you have one; your own name is fine if you do not.
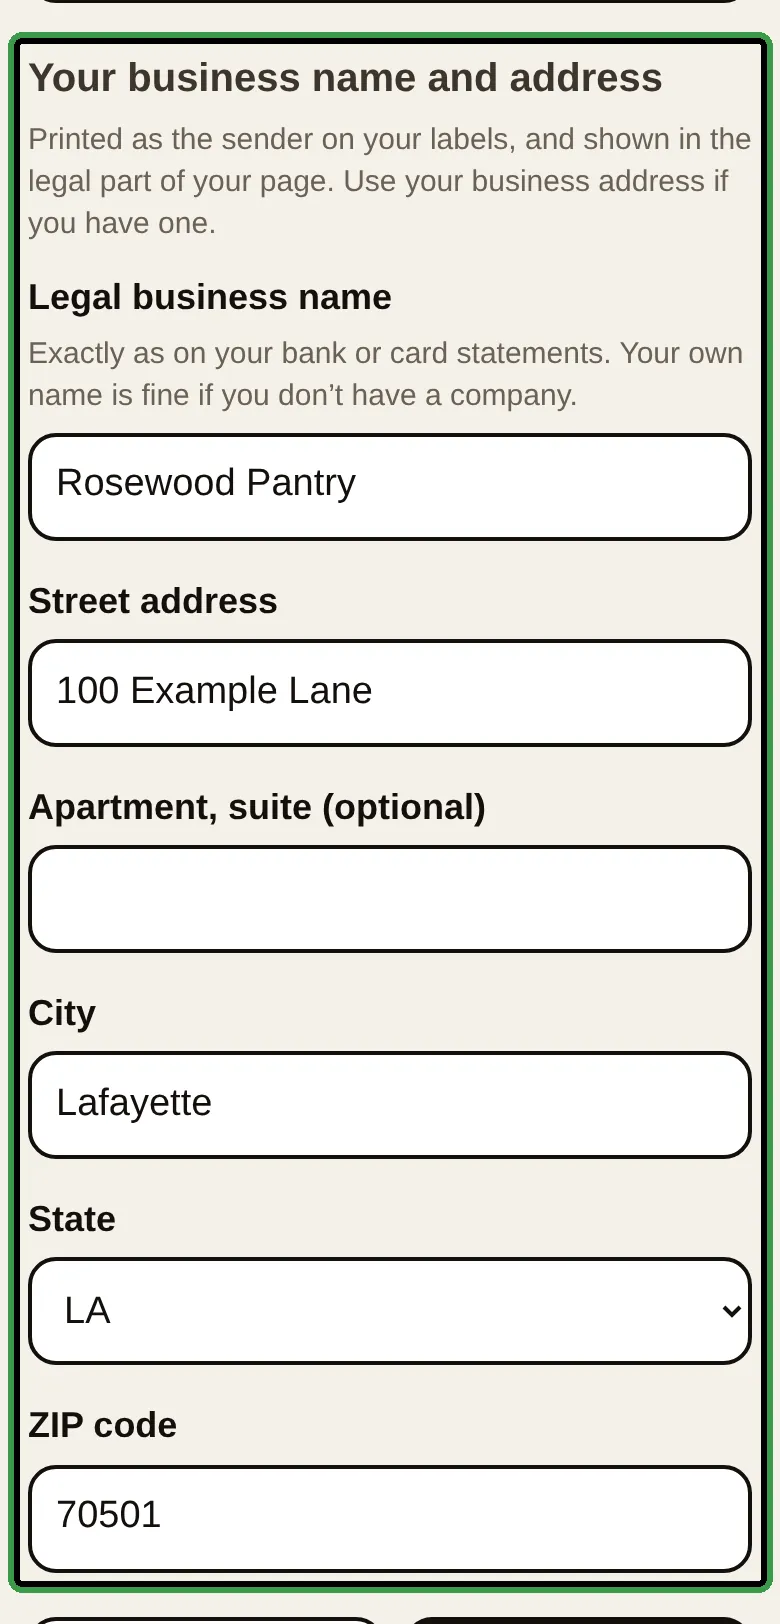
The address is only used for labels and the legal note. Your customers see it exactly like on a real package from you.
S9
Set up your shop · step 5 of 6
Tell your customers who you are
0:00
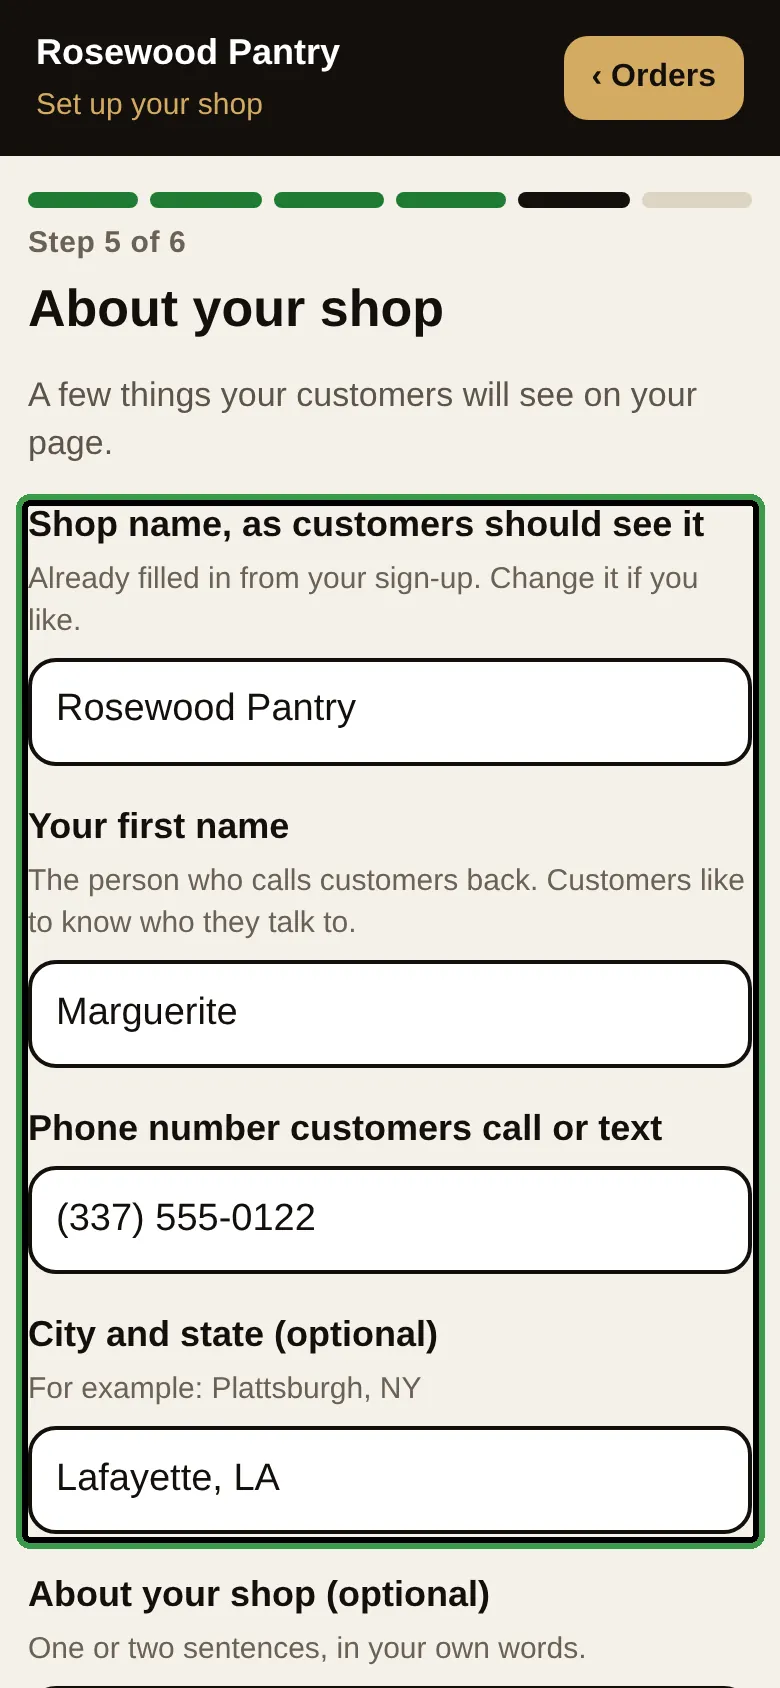
- 1Shop name as your customers should see it, your first name (the person who calls back), the phone number customers call or text, your city and state, and one or two sentences about your shop.
- 2Two optional boxes: your logo, and Anything else Salah should know? — that last box is for Salah only, it is never shown on your page. Then tap the dark button Next: check and send.
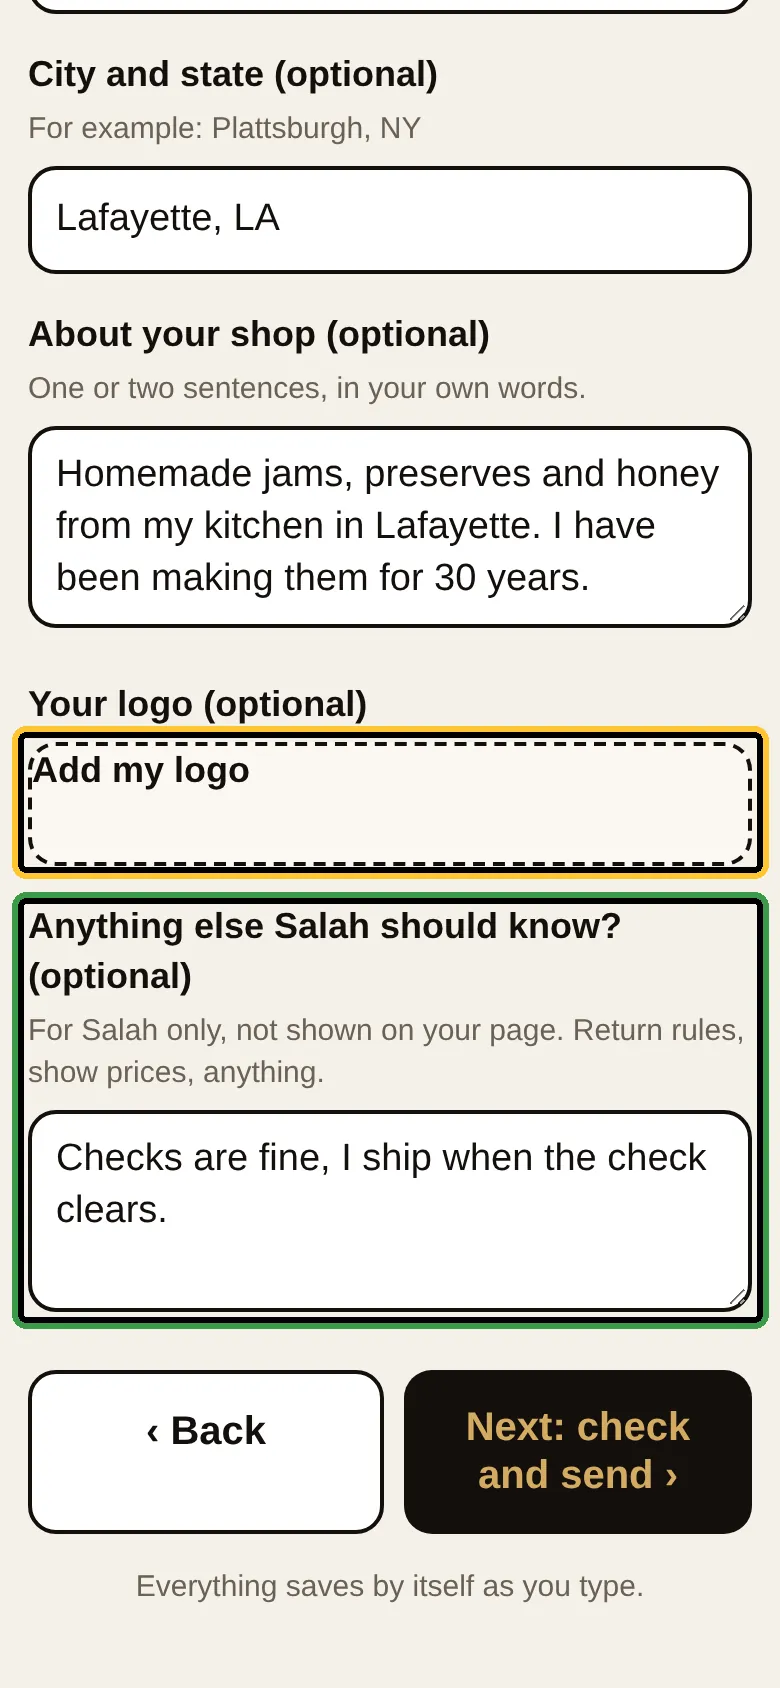
Short sentences work best. “Homemade jams and honey from my kitchen in Lafayette. 30 years of it.” says everything.
S10
Set up your shop · step 6 of 6
Publish your page
0:00
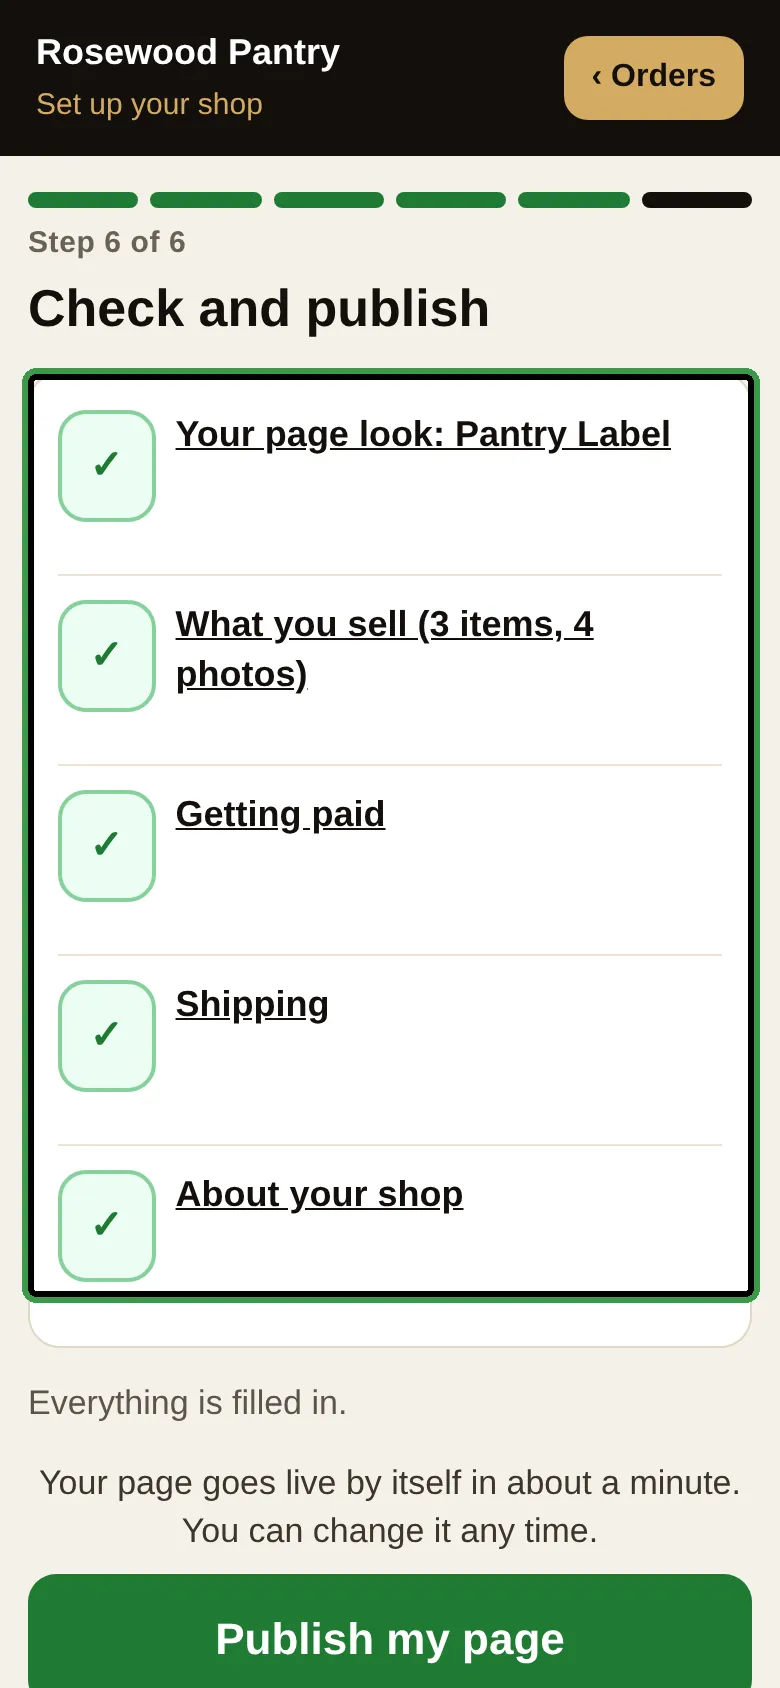
- 1Five lines, all checked in green: your page look, what you sell, getting paid, shipping, about your shop. Read them one more time, slowly. Something wrong? Tap that line and fix it.
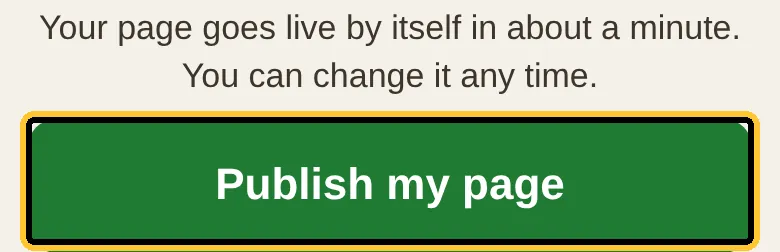
- 2When everything is right, tap the green button Publish my page.
- 3✓ Published! Your page goes live by itself, in about a minute, and you get an email with the link. Look at it on your phone, change anything you like, then publish again.
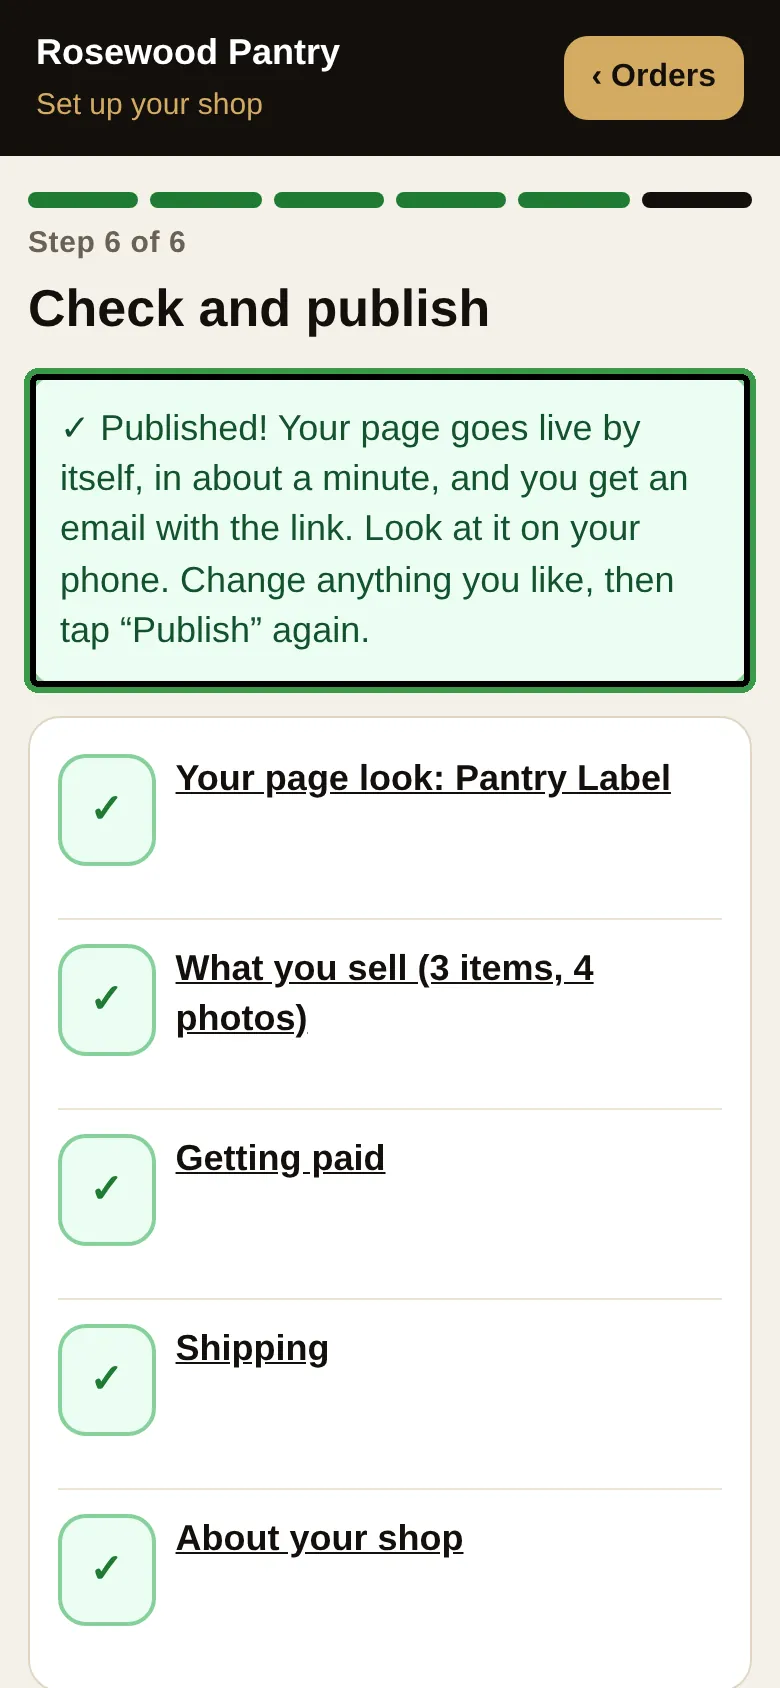
A line that is not green means something is still missing: tap it, the app shows you what to fill in. Nothing is sent to your customers before you publish.
Part C · 1 stepOn your phonePings and the app icon
S11
On your phone
Two little things, and you are done
0:00
- 1First, go back to your Orders page: tap ‹ Orders, at the top right of your app. Line 3 now says ✓ Done. Line 4: tap Turn on, then tap Allow. Your phone makes a little sound at each new order. Once on each phone you use.
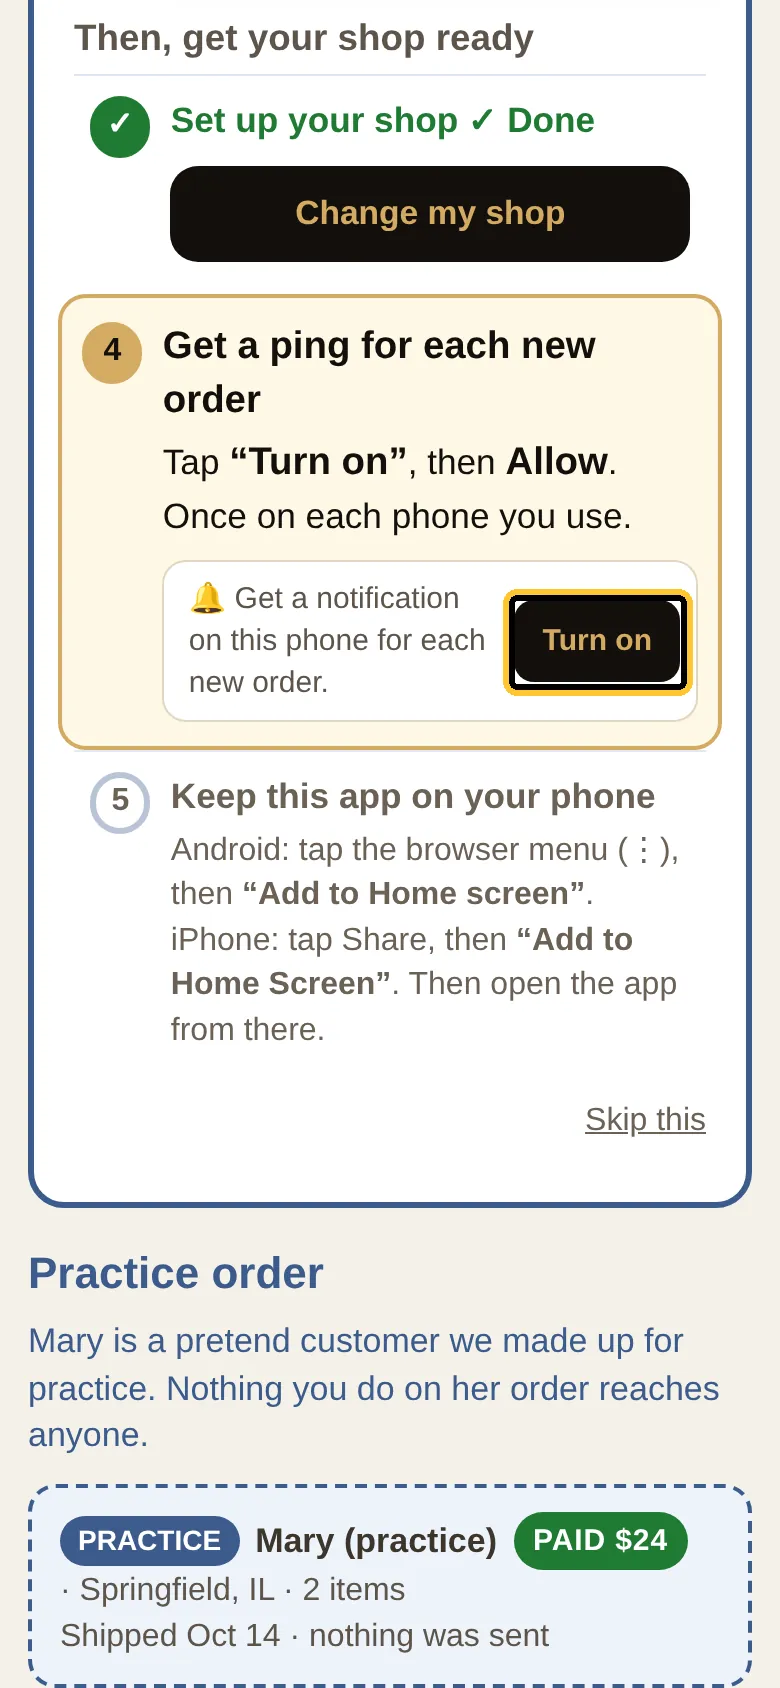
- 2Line 5: keep the app on your phone. Android: tap the browser menu (⋮), then “Add to Home screen”. iPhone: tap Share, then “Add to Home Screen”. Open your app from that icon from now on, like any other app.
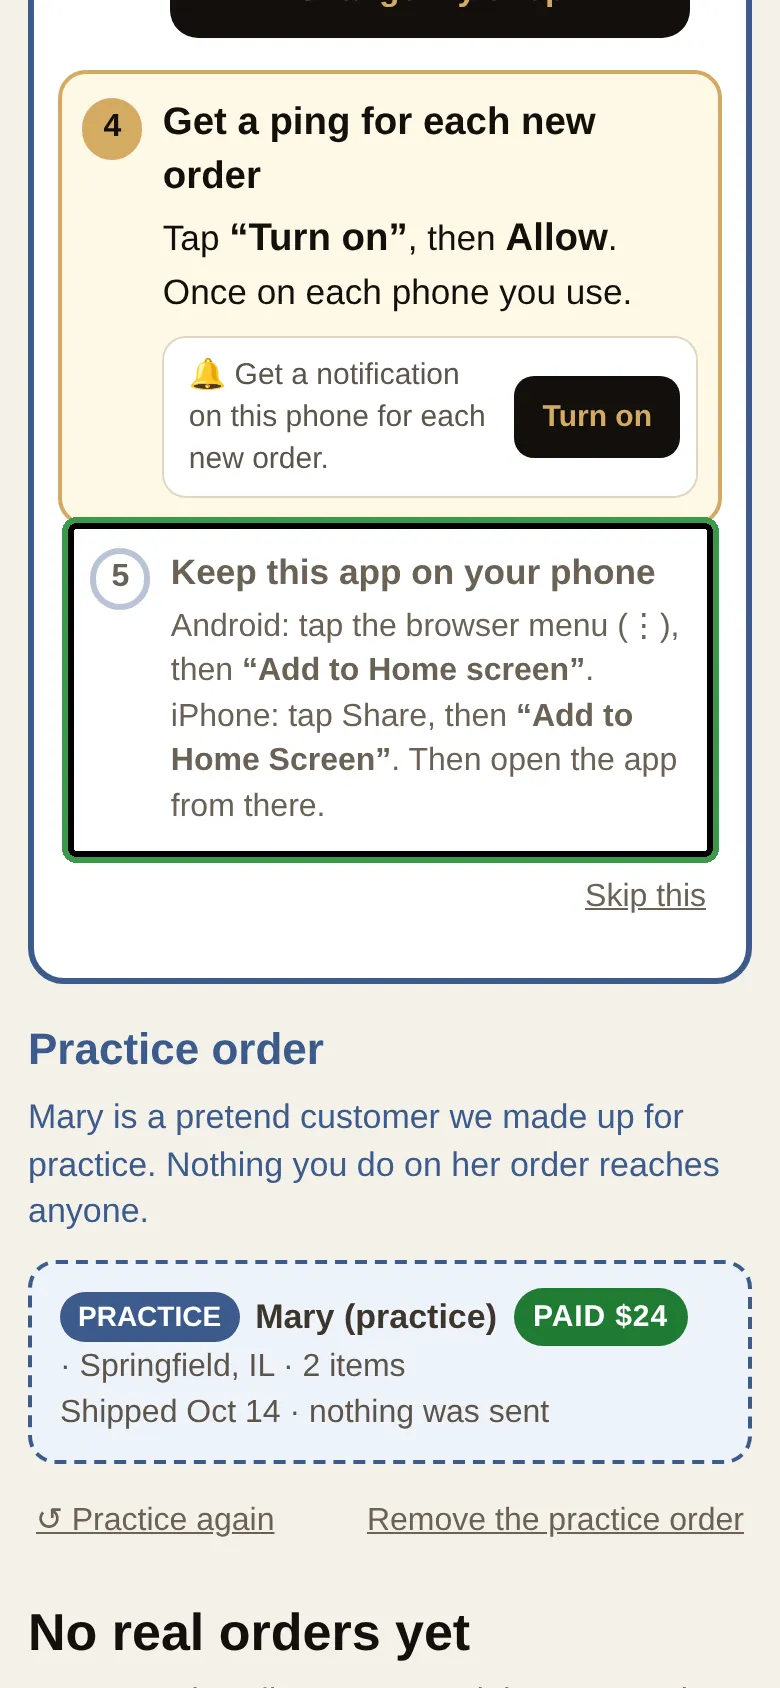
With the app on your phone and the pings on, you never miss an order: your phone rings, you open the app, and the order is waiting there.
Part D · 1 stepWhat happens nextPage, Google, payment, first order
S12
What happens next
Your page is live, and the rest is simple
0:00
- 1Your page is live at your own address, and you can open it on your phone, like a customer would. Look at it once, on the phone you use every day.
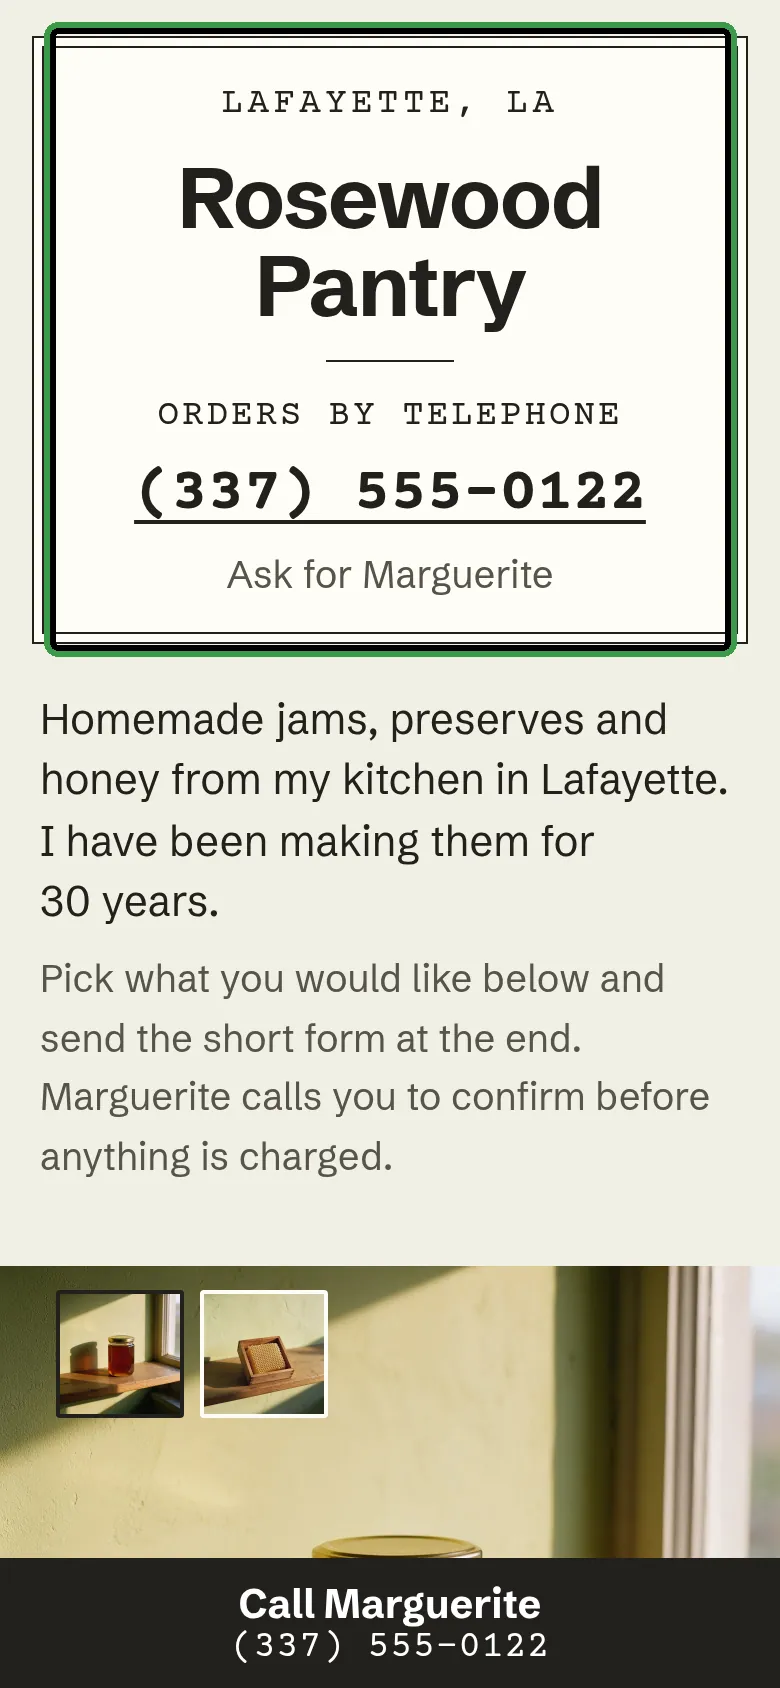
- 2Salah looks at every new page. If you asked to be listed on Google and Bing, he sends your page to them; they decide when it appears — nobody can promise that. Any question, any time: he is one email away.
- 3Your payment. Your first 3 months are already paid (Essential $117, or Complete $177). From the 4th month, your monthly price starts: $39 for Essential, $59 for Complete. Stop any time with one email.
- 4And your first real order will look exactly like Mary’s practice order: a card at the top of your app, get paid, ship, and your customer gets the “on its way” email with the tracking number.
That is the whole guide. Keep this page in your favourites, and come back when you have two minutes.